

How to Use Online Logic Puzzles Grid Templates in Your Offline Classroom
You can transform digital logic grid puzzles into effective offline classroom activities in about 15 minutes by downloading puzzle templates, printing them on standard paper, and distributing them as hands-on worksheets. No student devices or internet connection required once you’ve prepared the materials.
This approach solves a common classroom challenge: you want to harness the engaging power of online logic puzzles without the tech barriers, screen-time concerns, or connectivity issues that come with digital learning. The process is straightforward and lets you customize puzzle difficulty, topics, and grid sizes to match your students’ needs before you ever hit print.
Logic grid puzzles strengthen critical thinking, deductive reasoning, and problem-solving skills while keeping students genuinely engaged. When you bring these puzzles into your classroom as printed activities, you maintain full control over the learning environment. Students can write directly on the grids, work collaboratively in pairs, and develop their reasoning strategies without distractions.
The best part? Once you’ve set up your workflow, you can generate fresh puzzles for different units, skill levels, or review sessions throughout the year. Whether you’re filling those tricky last 10 minutes of class, creating enrichment activities for early finishers, or building a full lesson around logical reasoning, printed grid puzzles adapt to your teaching style and classroom needs.
What You’ll Need to Get Started

Good news, you probably have most of what you need already sitting in your classroom or supply closet! The beauty of using online logic grid puzzles offline is that the required materials are simple and straightforward.
Here’s what you’ll need to transform digital puzzles into hands-on classroom activities:
- Computer or tablet with internet access to browse and download puzzle templates
- Working printer with adequate ink (color adds visual appeal, but black-and-white works perfectly)
- Standard printer paper or cardstock for more durable puzzles
- Laminating pouches and laminator (optional, but great for reusable puzzle sets)
- Dry-erase markers if you choose to laminate puzzles for repeated use
- Student recording sheets, notebooks, or scratch paper for students to work out their solutions
- Projector or document camera (optional) for whole-class instruction and demonstrations
The absolute essentials are just three things: a device to download the template, a printer, and paper. Everything else enhances the experience but isn’t required to get started. If you’re planning to use the same puzzles with multiple classes or want students to tackle the same puzzle more than once, investing in laminating supplies pays off quickly. Otherwise, simple printed copies work beautifully for one-time use or when you want students to mark directly on the puzzle grid itself.
Important Tips Before You Start
Before diving into your first logic grid puzzle, take a few minutes to set yourself up for success. Start by previewing the entire puzzle, read through all the clues to confirm they’re age-appropriate and free of content that might confuse or distract your students. This is especially important if you’re adapting templates from general puzzle sites rather than education-specific resources.
Test print one copy before you commit to printing thirty. Check that the grid lines are clear, the text is readable, and any graphics or images reproduce well in black-and-white if you’re not using color. This simple step saves paper, ink, and the frustration of handing out puzzles students can’t actually read. Speaking of ink, glance at your printer levels before you download multiple templates, running out mid-print when you’re prepping for a no Wi‑Fi classroom activity is no fun.
Consider your students’ current skill levels honestly. If they’ve never solved a logic grid before, choose a small 3×3 or 4×4 grid with straightforward clues. Research shows that differentiation improves motivation so having puzzles at two difficulty levels ready lets you support all learners without anyone feeling left behind or bored.
Step-by-Step: From Online Download to Offline Classroom Success
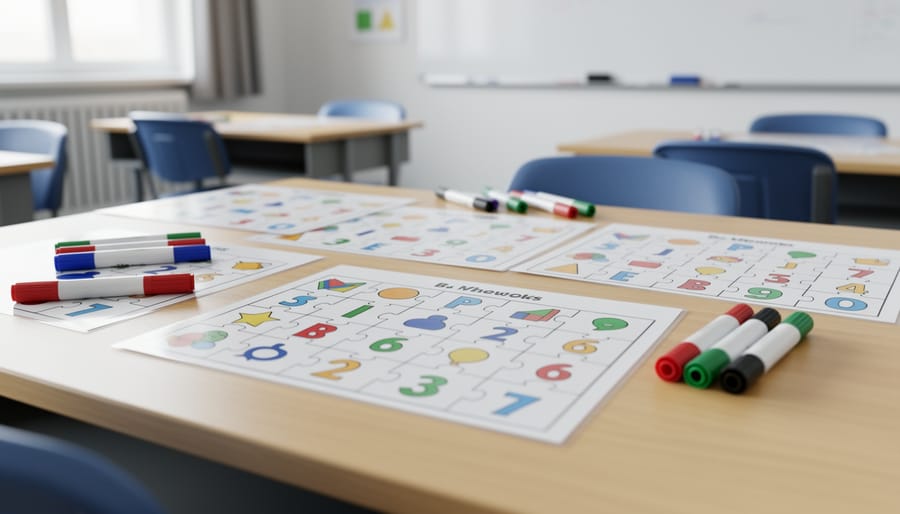
Find and Download Your Logic Grid Puzzle Template
Start by visiting trusted teacher resource sites that specialize in unplugged logic activities, look for templates specifically designed for classroom use rather than consumer puzzle sites. Quality templates will clearly state whether they’re editable (PowerPoint, Google Slides) or print-ready (PDF).
When browsing templates, prioritize options that let you customize the content. The best templates include editable clue sections, adjustable grid sizes, and blank versions where you can add your own curriculum-connected content. Check the preview images carefully to ensure the grid layout is clear and age-appropriate for your students.
Once you’ve found the right template, click the download button and choose your preferred format. PowerPoint files offer maximum flexibility for customization, while PDFs work great if you’re happy with the existing content. Save the file to a clearly labeled folder on your computer, you’ll likely want to use it again and create variations for different units throughout the year.
Before moving to the next step, open the file to confirm it downloaded correctly and that all text and grid lines are visible.
Customize for Your Classroom
Open your downloaded template in PowerPoint or your PDF editor, and you’ll unlock the real magic of these puzzles, making them yours. Start by clicking into the clue section and swapping generic content for topics your students are actually studying. That geography unit on state capitals? Perfect puzzle material. Vocabulary words from your current novel? Even better.
Adjust difficulty by controlling how many clues you provide and how complex the relationships are. Younger students need straightforward “who has what” connections, while older ones can handle multi-step deductions. Change the grid size too, beginners work well with 3×3 grids, but challenge advanced students with 4×4 or 5×5 layouts.
The category headers are your curriculum integration sweet spot. Replace placeholder categories like “Person” and “Color” with subject-specific ones: “Scientists” and “Discoveries” for science class, or “Authors” and “Book Titles” for language arts. Type your own clues directly into the template, building each one to reinforce a specific learning objective.
Don’t forget the visual elements. Most templates let you adjust fonts for readability and add your school logo or classroom branding. Some teachers color-code different difficulty levels or add small images next to categories to support visual learners.
Save your customized version with a clear file name like “State-Capitals-Logic-Puzzle-Grade4” so you can reuse and refine it year after year. The fifteen minutes you spend personalizing now pays off in genuine student engagement later.
Print and Prepare Your Materials
Now you’re ready to turn that digital file into classroom-ready materials. Start with a test print of one puzzle to check clarity, nothing’s worse than discovering tiny, unreadable text when you’re already standing at the copier with thirty students waiting.
Color vs. Black-and-White: Most logic grid puzzles work perfectly in black-and-white, saving you ink and budget. Reserve color printing for puzzles where color-coding helps differentiate categories or makes the grid easier to navigate. If you’re printing lots of copies, grayscale is your friend.
Paper Choices: Standard 8.5×11 works for most puzzles, but consider 11×17 if your grid has many categories or you want students working in pairs. Cardstock holds up better for repeated use and feels more substantial in students’ hands.
The Laminating Game-Changer: If you’ll reuse puzzles across classes or years, laminating transforms them into printable review stations. Students solve with dry-erase markers, you wipe clean, and the same puzzle serves multiple periods. Laminate answer keys too, they’ll survive the school year.
Organization Matters: Clip each puzzle set with its answer key, label with difficulty level or topic, and store in folders by unit. When you need a quick critical thinking activity, you’ll grab and go instead of scrambling through files.
Introduce the Puzzle to Your Students

Start with a whole-class demonstration on your whiteboard or projector. Write out the first clue, read it aloud, and think through it step-by-step: “If Sarah doesn’t like pizza, I’ll put an X in Sarah’s pizza box because we know it’s not true.” Model placing a checkmark when you confirm a match. This shared problem-solving will boost engagement and give everyone the same foundation.
Next, explain your marking system clearly. X means “no” or “not possible,” and a checkmark means “yes” or “confirmed.” Show how finding one match often creates new X’s across that row and column. Walk through two or three clues together, letting students call out what marks to make and why.
Set expectations before releasing them to work. Decide whether students tackle puzzles individually, in pairs, or small teams. Make it clear that struggling is part of the process and raising a hand for a hint is perfectly fine. Remind them to work methodically through the clues in order rather than jumping around. Give a realistic time frame so they can pace themselves without rushing.
Making Sure It Works: Check Your Results
Watching students complete a logic puzzle is one thing, knowing they truly understood the process is another. Start by circulating while students work, glancing at their grids to spot patterns. Are they using X’s and checkmarks consistently? If you see random guessing or erased chaos, pause for a quick review of marking strategies.
Once puzzles are finished, try peer review before revealing answers. Pair students up and have them explain how they solved specific clues, not just their final answers. This conversation reveals whether they followed logical steps or got lucky. Listen for phrases like “I eliminated this option because…” rather than “I just guessed.”
Answer keys work best as teaching tools, not just verification. Project the completed grid and walk through the solution together, asking students to explain the reasoning behind each deduction. “Who can tell me why this person couldn’t have the red car?” This turns checking into learning.
Pay attention to how students handle the process, not just accuracy. Did they mark systematically? Could they explain their thinking? If most students struggled, the puzzle might’ve been too advanced, scale back difficulty next time.
For students who breeze through, prepare extension challenges: tighter time limits, creating their own clues, or solving without physical marks. The goal isn’t just a completed grid, it’s building reasoning skills that transfer beyond the puzzle.
Quick Answers to Your Logic Puzzle Questions
Here’s what teachers ask most often when they’re ready to bring logic grid puzzles into their classrooms:
How long does it take students to complete a logic grid puzzle?
A simple 3×3 grid takes most students 10-15 minutes, while more complex 4×4 or 5×5 grids can range from 20-45 minutes depending on difficulty and student experience. First-time solvers need extra time to learn the marking system.
What grade levels work best for logic grid puzzles?
You can adapt logic grids for grades 2-12 by adjusting vocabulary, clue complexity, and grid size. Second and third graders do great with 3×3 grids using familiar topics, while middle and high schoolers can tackle 5×5 grids with abstract concepts.
Can students work in groups on these puzzles?
Absolutely! Partner work is fantastic for beginners because students talk through their reasoning out loud. Groups of three or four also work well, though make sure everyone participates rather than one student doing all the solving.
How do I differentiate logic puzzles for mixed-ability classrooms?
Print the same puzzle topic at different grid sizes, adjust the number of clues you provide, or give struggling students a partially completed grid to finish. Advanced students can create their own puzzles for classmates to solve.
What should I do when students get stuck?
Resist giving away answers and instead ask guiding questions like “What information does this clue give you?” or “Which boxes can you eliminate?” Walking students back through clues they’ve already used often unsticks them without direct help.
These questions come up in every workshop I run, and they’re totally normal concerns when you’re starting out. The best advice? Jump in with a simple puzzle and learn alongside your students. You’ll quickly discover what works for your specific classroom and grade level, and students will surprise you with how quickly they catch on to the logical reasoning process.
You’ve got everything you need to bring logic grid puzzles into your classroom tomorrow. Download a template tonight, customize it with content your students care about, print enough copies, and watch them tackle problems with genuine focus. No special tech setup required, no wifi headaches, just pure reasoning practice that sticks.
Start small if you’re new to this. Pick one puzzle that connects to what you’re already teaching, walk your class through it together, and see how they respond. Most teachers find their students asking for more puzzles by the end of that first session. Once you’ve seen how smoothly the process works, you can build a collection of templates for different units, skill levels, and classroom situations. The initial download-and-print routine becomes second nature fast, and you’ll have a go-to activity that strengthens logical reasoning while keeping your students thoroughly engaged.