The Cable Chaos in Your Game Classroom (And How to Fix It Before Someone Trips)
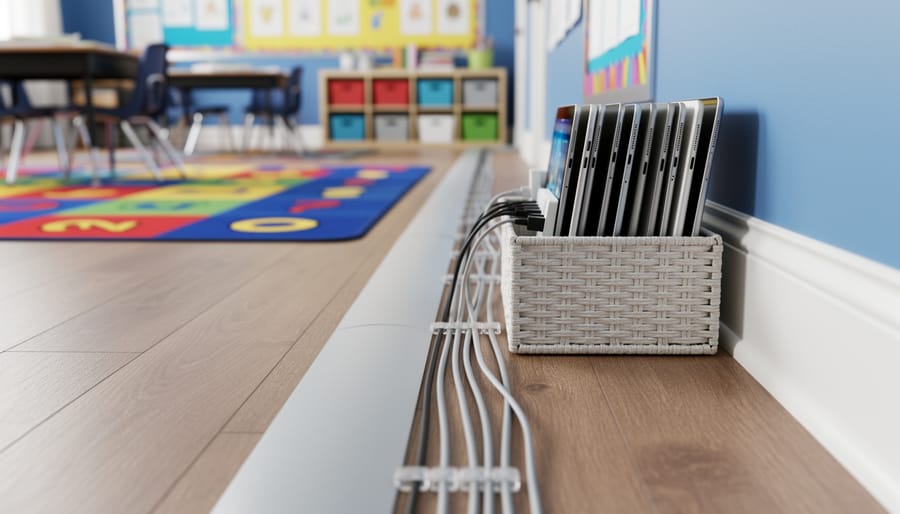
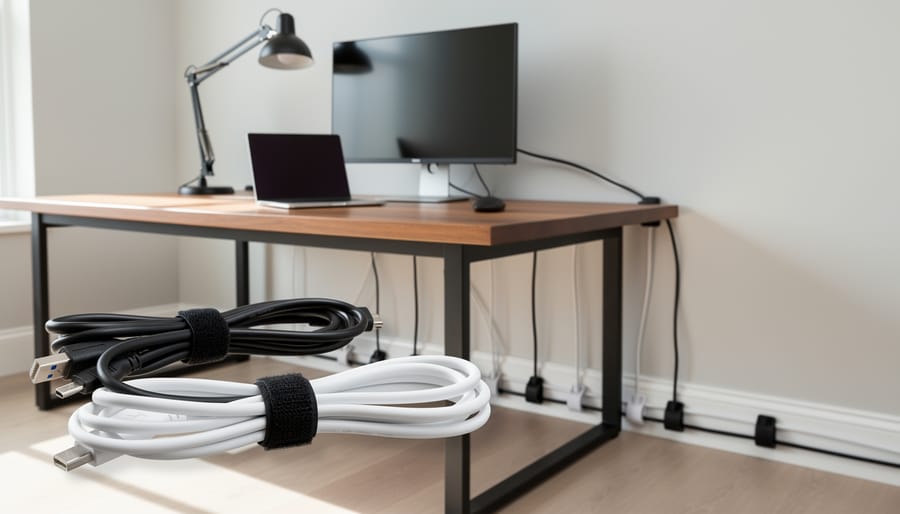
Secure loose cables along baseboards and walls using adhesive cable clips or cord covers to prevent tripping hazards during active classroom games. Bundle multiple device chargers together with velcro cable ties rather than tape, making it easy to reorganize when you rearrange desks for different activities. Designate a specific charging station away from high-traffic areas where students can safely plug in tablets or laptops between learning sessions. Label each cable with colored tags or washi tape so you and your students can quickly identify which cord belongs to which device, eliminating confusion and saving precious class time. Create a simple “cable routine” where students help wind up cords after tech-based activities, teaching responsibility while keeping your classroom organized. Use cable management boxes or decorative baskets to hide power strips and excess cord length, transforming potential eyesores into neat solutions that blend with your classroom decor. These practical strategies protect your students, extend the life of your equipment, and maintain the welcoming, organized environment that helps everyone focus on learning and having fun.
Why Cable Management Matters in Your Classroom
Safety First: Tripping Hazards and Student Wellbeing
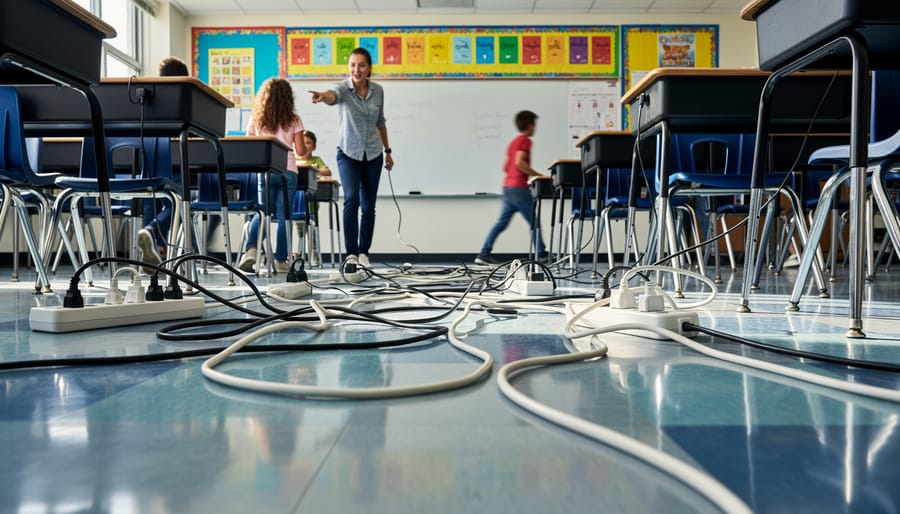
Let’s be honest – tangled cables snaking across your classroom floor are accidents waiting to happen! When your students are caught up in the excitement of an interactive learning game, they’re focused on answering questions and collaborating with teammates, not watching where they’re stepping. Those loose power cords and charging cables become serious tripping hazards, especially during activities that get everyone moving around.
Picture this: students rushing to different stations during a team-based quiz game or gathering around a smartboard for a group challenge. One misstep over a power cable could lead to twisted ankles, bumped heads, or worse. Beyond the physical injuries, there’s also the risk of yanking expensive equipment right off desks when someone catches a cable with their foot.
The good news? Cable management isn’t complicated or costly. Simple solutions like cord covers, cable clips, and organized charging stations can transform your classroom into a safer learning environment. When cables are properly secured along walls or tucked under desk edges, you create clear pathways for movement. Your students can focus entirely on the learning experience without navigating an obstacle course, and you can facilitate activities with confidence knowing everyone’s safe.
Protecting Your Tech Investment
Your classroom tech isn’t cheap, and tangled cables can quickly turn your investment into a repair bill. When projector cords get pinched under desk legs or laptop chargers are constantly yanked, you’re looking at frayed wires and broken connections. Proper cable management protects your equipment from everyday wear and tear, especially during those exciting game sessions when students are moving around.
Think of cable clips, cord covers, and velcro straps as insurance policies for your tech. They keep cables secure and off the floor where they’re less likely to be tripped over or damaged. Plus, organized cables mean you can quickly set up and pack away your PowerPoint games without the frustrating tangle-tussle. A little prevention now saves you from missing out on those amazing interactive activities later because your equipment gave out. Your tech deserves the protection, and your budget will thank you.
Common Cable Problems in Game-Ready Classrooms
The Projector-Laptop-Speaker Triangle
You know the setup: laptop plugged into the projector, speakers connected for sound, and suddenly your teaching station looks like a tech spider’s nest! When you’re running an exciting PowerPoint game, the last thing you need is students tripping over cables or accidentally unplugging something mid-game.
Here’s your game plan: Start by positioning your laptop closest to the projector to minimize that cable length. Use a small power strip placed under or behind your desk to keep everything plugged into one spot. Bundle those three main cables together using velcro ties or cable clips, creating one manageable pathway instead of three separate trip hazards.
Pro tip: Run the bundled cables along the wall or tape them down with classroom-safe floor tape if they cross walkways. Consider getting a wireless presenter remote so you can step away from the cable zone while keeping your game moving smoothly. With this simple triangle tamed, you’ll spend less time untangling and more time celebrating student victories!
Extension Cord Overload
Let’s talk about a super important safety issue that can pop up in busy classrooms! When you’re setting up interactive learning stations with tablets, projectors, or gaming devices, it’s tempting to plug one extension cord into another, or connect multiple power strips together. This practice, called daisy-chaining, might seem like a quick fix when outlets are scarce, but it creates a serious fire hazard that puts your students at risk.
Each extension cord and power strip is designed to handle a specific amount of electrical current. When you chain them together, you’re drawing more power than they’re built to manage safely. This can cause overheating, melted plastic, and potentially spark a fire. Even if everything looks fine on the outside, dangerous heat can build up inside the cords.
Instead, invest in a single, high-quality surge protector with enough outlets for your needs, or better yet, work with your school to install additional wall outlets where you need them most. Your students’ safety is worth that extra planning step!
Student Device Charging Stations
Charging stations are game-changers for keeping device cables neat and tidy! When students use tablets or laptops during learning games, cables can quickly become a tangled mess. Create a dedicated charging hub using a multi-port USB charging station or power strip with built-in cable organizers. Place it in a central location where students can easily plug in devices during breaks or at the end of the day.
Label each charging cable with student names or device numbers using colorful tape or cable tags to prevent mix-ups. Use cable clips or velcro straps to keep cords bundled together and off the floor. A simple basket or drawer organizer near your charging station helps corral excess cable length and keeps everything looking sharp. This setup not only reduces tripping hazards but also teaches students responsibility for their tech tools. Plus, you’ll save precious instructional time by eliminating the daily cable treasure hunt!
Simple Cable Management Solutions That Actually Work
Cable Clips and Adhesive Organizers
Good news! You don’t need to spend a fortune to keep your classroom cables neat and safe. Adhesive cable clips are your new best friends, and they’re incredibly budget-friendly. These handy little helpers stick right onto desks, walls, or baseboards to guide charging cables and device cords exactly where you need them.
Start by mapping out your high-traffic areas. Position clips along desk edges to route tablet and laptop chargers away from where students walk. Wall-mounted clips work wonderfully for projector cables and interactive whiteboard connections. You can even create custom pathways that match your classroom layout perfectly.
Many teachers love the reusable adhesive options that won’t damage paint or surfaces when you need to rearrange. They’re perfect for flexible learning spaces! Color-coded clips add a fun touch while helping students identify which cables belong to which charging station. Pro tip: involve students in the setup process to teach responsibility and problem-solving skills while making your tech-friendly classroom safer for everyone.
Cable Sleeves and Raceways
Cable sleeves are a game-changer for keeping multiple cords together in one neat bundle! Think of them as friendly fabric tubes that zip or wrap around your charging cables, computer cords, and projector wires. They come in different colors and lengths, so you can customize them to match your classroom vibe while keeping trip hazards to a minimum.
Raceways are equally awesome for creating safe pathways along your walls and baseboards. These plastic or metal channels stick right to your wall and hide those pesky cables that run from your interactive whiteboard to the outlet or from your document camera to your computer. The best part? Students won’t accidentally unplug important equipment during exciting game-based activities, and you’ll maintain that clean, organized learning space you’ve worked hard to create. Installation is super straightforward with adhesive backing options, and many styles can be painted to blend seamlessly with your classroom walls. Your tech setup will look professional while staying completely functional.
Velcro Ties and Cable Wraps
Here’s a classroom favorite that’ll transform your tech setup: velcro ties and cable wraps! These reusable helpers are perfect for taming those pesky extra-long charging cables and device cords that seem to multiply overnight.
Think of velcro ties as your classroom’s best friend for cable control. They come in various bright colors, making it easy to color-code different device stations or learning centers. Simply wrap them around bundled cables to keep excess length neat and out of the way. The best part? Students can help with setup and cleanup, turning cable management into a quick classroom responsibility.
Cable wraps work similarly but offer even more flexibility. You can wrap them around coiled cables or use them to secure cords along table legs and edges. They’re gentle on wires, preventing the wear and tear that comes from constant tangling and untangling.
Keep a supply of these handy ties in your classroom toolkit. They’re budget-friendly, last for years, and make rearranging your tech setup for different activities a breeze. No more wrestling with tangled messes during precious learning time!
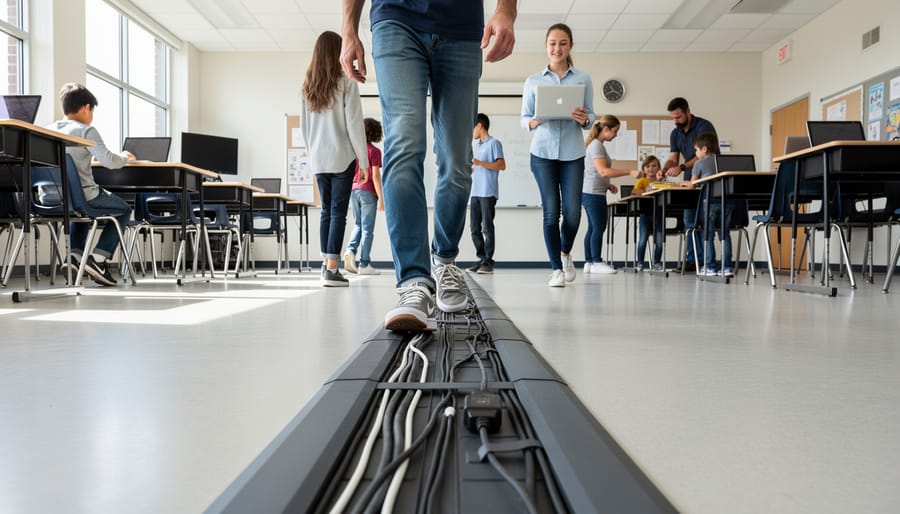
Floor Cable Covers
When cables need to cross walkways during interactive classroom activities, floor cable covers are absolute lifesavers! These protective strips keep your students safe from tripping hazards while protecting your valuable equipment from damage.
Look for durable rubber or plastic covers that can handle daily foot traffic. Rubber options work great because they’re flexible, lie flat against the floor, and have enough grip to stay put during energetic learning sessions. Plastic covers are another solid choice, especially the modular designs that let you customize the length for your specific classroom layout.
Here’s a fun tip: choose covers in bright colors like yellow or orange! Not only do they add a cheerful touch to your learning space, but they also serve as visual reminders for students to watch their step during game time.
Installation is super simple – most covers feature a channel that holds cables securely while the low-profile design minimizes tripping risks. You can find budget-friendly options that work perfectly for occasional use or invest in heavy-duty versions for classrooms with frequent tech-based activities.
Power Safety Basics Every Teacher Should Know
Understanding Outlet Capacity
When setting up your gaming stations, it’s important to know how much power your outlets can handle. Most standard classroom outlets provide 15 amps of electricity, which translates to about 1,800 watts. Sounds like a lot, right? Here’s the thing though—it adds up faster than you might think!
A typical tablet uses about 10-12 watts, while a laptop might use 50-100 watts. If you’re running multiple devices plus charging stations, you could easily approach that limit. A simple rule of thumb: avoid plugging more than three high-power devices into a single outlet or power strip.
Want to play it safe? Calculate the wattage of all your devices before plugging them in. Most devices have this information on their power adapters or in their manuals. If you’re unsure, spread your devices across multiple outlets in different parts of the room. This not only prevents overloading but also keeps your classroom organized and your interactive learning activities running smoothly!
When to Use (and Not Use) Power Strips
Power strips are classroom heroes when used correctly! They’re perfect for creating charging stations for tablets and laptops, or powering multiple interactive learning tools from a single outlet. Here’s your quick guide to staying safe: Always plug power strips directly into wall outlets and choose strips with surge protection and built-in circuit breakers for your tech equipment.
Now, here’s what to avoid: Never daisy-chain power strips together or plug them into extension cords. This creates serious fire hazards and overloads circuits. Skip using power strips for high-wattage appliances like space heaters or mini-fridges in your classroom. Before plugging in devices, add up their wattage to ensure you’re staying within your power strip’s capacity, usually around 1800 watts.
Think of power strips as temporary solutions for your interactive learning stations rather than permanent fixtures. Label them clearly so substitute teachers and students know which devices connect where, keeping your classroom both organized and safe!
Inspecting Cables Before Game Day
Before your students arrive for game day, take five minutes to give your cables a quick safety check. This simple routine can prevent disruptions and keep everyone safe during your interactive activities.
Start by running your fingers along each cord, feeling for any fraying, cracks, or exposed wires. Check that all plugs fit snugly into outlets without wobbling or falling out. Look for any signs of discoloration or melting near the plug ends, which could indicate overheating.
Next, make sure extension cords aren’t twisted or tangled, as this can damage the internal wiring over time. If you spot any cables with tape repairs or visible damage, set them aside and replace them before use.
Here’s your quick checklist: inspect for fraying or cracks, test plug connections, check for discoloration, untangle twisted cords, and remove damaged cables from use. Keep a small supply of replacement cables handy so you’re never caught off guard. This quick inspection becomes second nature and helps create a safer learning environment for all your exciting classroom games and activities.
Setting Up Your Classroom for Game-Based Learning
Planning Your Tech Layout
Before you start plugging in devices, take a moment to map out your ideal tech setup. Grab a piece of paper and sketch your classroom layout, marking where students will gather for interactive activities. Think about which walls have outlets and how far your projector, tablets, charging stations, and gaming consoles need to reach.
Consider the flow of student movement during activities. You want power sources near your tech hub, but cables shouldn’t cross walkways where kids might trip. Place frequently-used devices like document cameras or interactive displays closest to existing outlets to minimize cord length.
Group equipment by function too. Keep all your gaming equipment together, charging stations in one designated spot, and presentation tech in another. This clustering approach makes cable management much easier and helps you avoid that tangled spaghetti mess behind your desk.
Remember, a little planning now saves tons of frustration later. You’ll thank yourself when setup takes minutes instead of half your prep period!
Creating Student Movement Zones
Think of your classroom as a game board where movement matters! When setting up interactive activities, mapping out clear student zones is your first step to cable safety success.
Start by identifying your high-traffic areas. Where will students be walking, jumping, or reaching during games? Mark these zones mentally or with tape on your floor. Your goal is simple: keep all cables completely outside these movement paths.
Position your equipment strategically along walls or in corners where students won’t need to walk. If your projector or speakers need to be more centralized, create a “technology island” that students move around rather than through. Use furniture like desks or book bins as natural barriers that guide foot traffic away from cable zones.
For floor-level cables that absolutely must cross pathways, invest in inexpensive cable covers or cord protectors. These bright, rubber ramps make cables visible and prevent tripping hazards. You can even turn them into part of the game by designating them as “bridges” students step over!
Consider vertical space too. Ceiling-mounted equipment or wall-hung devices naturally keep cables elevated and out of reach. With thoughtful planning, your classroom becomes both tech-friendly and wonderfully safe for active learning adventures!
Here’s the great news: cable management doesn’t have to be complicated or expensive! You don’t need to transform your entire classroom overnight. Start with just one small improvement, maybe securing those cords under your whiteboard or organizing the cables around your computer station. Every step you take makes your classroom safer and more inviting for learning.
Remember, when your classroom is organized and hazard-free, you create the perfect environment for students to focus on what really matters: having fun while learning through interactive games. No one trips over cords, you spend less time troubleshooting tech issues, and more time watching your students engage and grow.
Think of cable management as an investment in your teaching success. A tidy, well-organized space shows students that their learning environment matters, and it gives you the peace of mind to embrace all the amazing possibilities of game-based learning without worry.
So grab those zip ties, pick up some cable clips, and take that first step today. Your future self (and your students) will thank you! You’ve got this, and your classroom is about to become an even better place for interactive learning adventures.