
How to Make a Blooket Game as a Student in 5 Simple Steps
Creating your own Blooket game as a student takes about 10 to 15 minutes once you have a free account, and the process works entirely through your web browser with no downloads required. You’ll choose a game mode, write your questions and answers, customize the set with images or descriptions, and then generate a game code to share with classmates for study sessions or group review.
Students turn to Blooket creation for two big reasons: taking control of how you study makes the material stick better, and you can tailor questions to exactly what’s coming up on your next quiz or test. Whether you’re prepping solo, organizing a study group, or even surprising your teacher with a custom review game, building your own set puts you in the driver’s seat. The platform is designed for educators, but the student interface is straightforward enough that you won’t get lost in complicated menus or settings.
One heads-up before you start: some schools block student accounts or restrict certain features during class time, so check your school’s policy or create your account at home if you run into access issues. You’ll also want to gather your study materials ahead of time, like notes, flashcards, or your textbook, so you can write accurate questions without scrambling mid-creation. Once your set is live, you can edit it anytime, share it with friends, or even duplicate and remix it for different subjects. Let’s walk through every step so you can launch your first game by the end of this guide.
What You’ll Need to Get Started
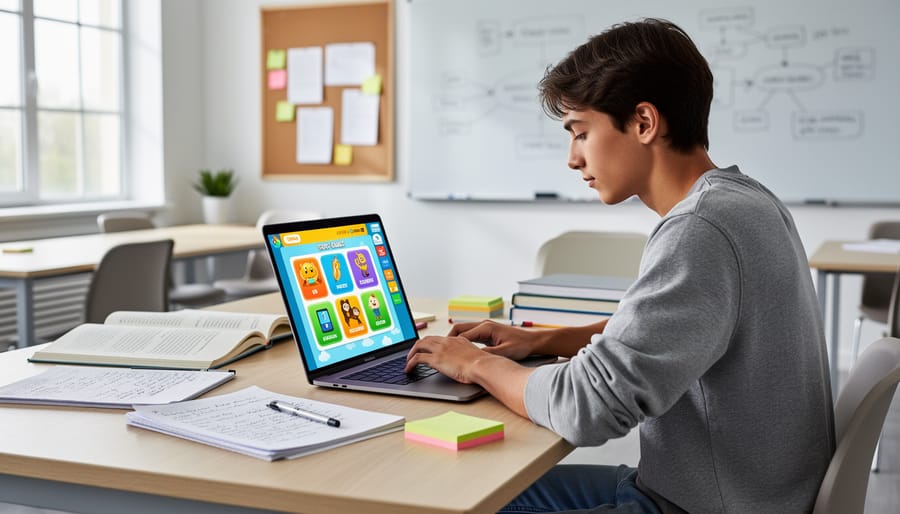
Before you start building your Blooket game, gather everything you need so the process goes smoothly. The good news is that you don’t need any special equipment or paid subscriptions, just the basics you probably already have access to.
Here’s your quick checklist of what you’ll need:
- A free Blooket account (you can sign up with an email address or Google account)
- A device with internet access (computer, tablet, or smartphone will work)
- Your study content organized and ready (notes, textbook questions, or flashcards)
- A stable internet connection to save your work as you go
- Optional: images or graphics to make questions more engaging
Setting up your account takes less than two minutes. Head to and click the sign-up button in the top right corner. You can create an account using your school email or link your Google account if your school uses Google Classroom. Choose a username you’ll remember, since you might want to share your games with classmates later.
Before you jump into creating questions, spend a few minutes organizing your study material. Look through your notes and decide which topics you want to cover. Write down 10-15 potential questions on scratch paper first, or type them in a notes app. Having your questions planned out beforehand makes the actual game creation much faster and helps you avoid getting stuck halfway through. Think about what format works best, multiple choice questions are easiest to start with, and they work perfectly for Blooket’s game modes.
Important Things to Know Before You Start

Before you jump into creating your first game, take a minute to understand some important guidelines that’ll keep you out of trouble and make sure your game actually works when you need it.
Check Your School’s Network Rules
Most schools block certain websites or features on their networks, and Blooket might be restricted during class time or on school devices. If you’re planning to create games at school, ask your teacher first or try accessing Blooket from home to avoid wasted effort. Some schools allow Blooket for teacher-led activities but block student accounts from creating new content.
Keep Your Account Private
When you sign up, use a school-appropriate username that doesn’t reveal personal information like your full name, age, or location. Set your game visibility to private unless your teacher specifically asks you to make it public. This keeps your content visible only to people you share the game code with, not the entire Blooket community.
Create Appropriate Content Only
Your questions and answers should relate to schoolwork and stay classroom-friendly. Avoid inside jokes that might offend others, pop culture references that distract from learning, or anything you wouldn’t want your teacher to see. Remember that teachers can view any game you share with the class, and inappropriate content could get your account restricted.
Respect Others When Collaborating
If you’re working with classmates to build a game together, give credit where it’s due and don’t claim someone else’s questions as your own. Taking questions from another student’s public game without permission isn’t cool, even if Blooket technically allows it.
Step-by-Step: Creating Your Blooket Game
Step 1: Log In and Navigate to Create
Open your web browser and go to . Click the blue “Log In” button in the top right corner, then enter your username and password. If you signed up through Google Classroom or another school account, pick that option instead.
Once you’re in, you’ll land on your dashboard. Look for the bright yellow “Create” button near the top of the screen, it’s usually right next to “Discover” and “My Sets.” Click it.
You’ll see a new screen with a blank question set template. At the top, there’s a text box asking for your set title, and below that you’ll find rows where questions and answers will go. The interface is clean and straightforward, no confusing menus. Everything you need to build your game is right there on one page.
Step 2: Name Your Game Set and Choose Settings
After you click ‘Create Set’, the first thing Blooket asks for is a title. Pick something specific that tells you exactly what the game covers. Instead of “Science Game,” try “Chapter 7 Cell Parts Quiz” or “Spanish Vocab Unit 3.” You’ll thank yourself later when you have ten different sets and need to find the right one fast.
Right below the title box, you’ll see visibility settings. “Private” means only you can see and use your game set unless you share the code directly. “Public” puts it in Blooket’s search so anyone can discover and play it. Most students should start with private, especially if your questions contain inside jokes or class-specific content your teacher might not appreciate spreading around.
You can add a description too, though it’s optional. This helps when you’re scrolling through your own library months later wondering which algebra review you actually finished.
Step 3: Add Your Questions and Answers
Now you’re ready to fill in your game content. In the question editor, you’ll see a blank question field at the top and four answer boxes below it. Type your question in the main field, be specific and clear. For example, instead of “What is photosynthesis?” try “Which process allows plants to convert sunlight into energy?” This gives students enough context to answer confidently.
Next, add your answer choices in the four boxes. You can use all four or just two or three, depending on your question. Click the circle next to the correct answer to mark it, this tells Blooket which response earns points. Double-check this step, because marking the wrong answer will confuse everyone during gameplay.
To work faster as you build your set, follow this efficient sequence:
- Type the full question first before touching the answer boxes
- Enter the correct answer in the first box and mark it immediately
- Add your wrong answers in the remaining boxes
- Review the marked correct answer one more time
If you want to add an image, click the small picture icon next to your question. Images help with science diagrams, geography questions, or vocabulary that’s easier to recognize visually. Keep images simple and clearly related to the question, blurry phone photos or complicated charts often confuse rather than help.
Write questions in complete sentences and keep answer choices roughly the same length. Students can sometimes guess the right answer if it’s noticeably longer or more detailed than the others. Mix up where you place the correct answer so it’s not always first or always third.
Step 4: Duplicate, Edit, and Organize Questions
Once you’ve added a few questions, Blooket gives you some handy tools to work faster and fix mistakes without starting over.
Duplicating Questions
See the three-dot menu on the right side of each question card? Click it and select “Duplicate” to instantly copy that question. This is perfect when you’re creating similar questions (like math problems that follow the same format) or when you want to change just one word or number. You can duplicate any question, then simply click into the text boxes to edit what needs changing.
Editing and Deleting
Made a typo? Click directly on the question text or any answer to edit it, no special button needed. If you marked the wrong answer as correct, just click the circle next to the right one. To delete a question completely, use that same three-dot menu and select “Delete.” There’s no undo button, so double-check before you delete.
Rearranging Order
Want your easiest questions first or hardest questions last? Click and hold the six dots (the drag handle) on the left side of any question card, then drag it up or down to reorder your set. This helps you create a logical flow that builds from simple review to tougher challenge questions.
Step 5: Save and Test Your Game
Once you’ve added all your questions, look for the big “Save” or “Create” button at the top or bottom of the screen, Blooket usually makes it pretty obvious. Click it, and your game set will save to your account automatically.
But don’t share it just yet! Hit the “Preview” or “Play” button to see your questions in action. Choose any game mode (Tower Defense and Classic are good for quick tests) and select “Solo” so you can play through it yourself. This lets you catch mistakes before your classmates or teacher sees them.
As you play, watch for typos in questions, wrong answers marked as correct, or images that don’t load. If something looks off, exit the game and click “Edit Set” from your dashboard to fix it. You can change questions anytime, even after you’ve shared the game.
Testing takes just a few minutes but saves you from embarrassing errors later. Run through at least five or six questions to make sure everything works smoothly. Once you’re confident it’s error-free, you’re ready to share your game with others.
How to Check If Your Game Works Correctly
After you save your game, don’t share it with your class just yet. Taking a few minutes to test everything can save you from embarrassing mistakes during live play.
The easiest way to verify your game is through solo play mode. Click on your saved question set from your dashboard, then select any game mode and choose “Solo” instead of hosting a live game. Play through at least five to ten questions, this lets you see exactly what your classmates will experience. If you spot a wrong answer marked as correct or notice a typo, you can fix it before anyone else sees it.
Before you consider your game ready, run through this quick checklist:
- Every correct answer is actually marked as correct (not just the first option by default)
- All questions make sense and aren’t missing words or punctuation
- Images appear properly and aren’t stretched, blurry, or cut off
- Answer choices are randomly ordered so the correct answer isn’t always in the same position
- Question difficulty is appropriate for your target audience
If you added images, pay special attention to how they display on different devices. What looks good on your laptop might appear weird on a phone or Chromebook. Ask a friend to pull up your game on their device for a second opinion, they’ll also catch confusing wording you might have missed.
When you find mistakes after publishing, don’t panic. Go back to your dashboard, click the three dots next to your game set, and select “Edit.” Make your changes, hit save again, and the game code stays the same. Your updated version will be ready the next time someone plays.
What to Do Next: Sharing and Playing Your Game
Now that you’ve created your game, it’s time to share it and see your classmates in action. Click the “Host” button next to your saved game set on the dashboard. You’ll see two main options: host a live game right now or assign it as homework.
For live games, Blooket generates a unique game code (usually 6-7 digits) that appears on your screen. Share this code with your classmates by writing it on the board, posting it in your class chat, or just telling them out loud. They’ll go to and enter that code to join. You can choose from different game modes like Tower Defense, Gold Quest, or Cafe, depending on what style fits your study session best.
If your teacher allows homework mode, you can set a due date and share the assignment link directly. This lets classmates play on their own time and review the material at their own pace.
Want to improve your games? Ask friends for honest feedback after they play. Did any questions confuse them? Were the answer choices too obvious or too tricky? You can edit your set anytime by clicking the pencil icon on the dashboard.
Don’t forget to explore the “Discover” tab to see what other students have created. You might find great study sets you can use or remix, and seeing how others structure their questions can spark ideas for your next game.
Quick Tips for Making Better Blooket Games
Want your Blooket games to actually help you study? Focus each game set on just one topic or chapter, mixing algebra and biology questions confuses everyone and makes review less effective. Aim for 15-30 questions per game. Fewer than 15 feels too quick, and more than 30 drags on, especially during fast-paced game modes like Gold Quest or Tower Defense.
Mix up your difficulty levels. Start with easier recall questions to build confidence, then sprinkle in harder application or analysis questions to challenge yourself and your classmates. This keeps everyone engaged regardless of their mastery level. Adding images makes a huge difference for visual learners. A diagram, photo, or simple graphic can clarify tricky concepts and break up text-heavy questions.
Collaborating with study group members spreads the workload and catches mistakes you might miss solo. One person can draft questions while another finds images or reviews for accuracy. Just make sure everyone agrees on the correct answers before publishing.
Word association games work differently, they’re great for vocabulary building and quick-fire recall, but they lack the multiple-choice structure that helps with test prep. Use traditional Blooket question sets when you need detailed review, and save word association for memorizing terms, definitions, or foreign language practice.
Common Questions About Making Blooket Games
Students often have the same questions when they start making Blooket games. Here are answers to the most common concerns you might run into.
Can I make games on a phone?
Yes, but it’s harder. The Blooket website works on mobile browsers, but the small screen makes typing questions and managing answers frustrating. Use a computer or tablet with a keyboard whenever possible for a much smoother experience.
How many questions should I include?
Aim for 15 to 30 questions for most game modes. Fewer than 10 makes games feel too short, while more than 40 can drag on and lose players’ attention. Match the number to your study session length and topic complexity.
Can I copy someone else’s game?
You can duplicate public sets to edit and customize them, which Blooket allows. However, don’t copy a set and claim it as completely your own work, especially for assignments. Always give credit to the original creator if you’re sharing a modified version.
Do I need a paid account?
No. The free Blooket account lets you create unlimited question sets and host games with your class. Blooket Plus adds extra features for teachers, but students can do everything they need with the standard free version.
If you’re wondering whether teachers can see your games, it depends on your settings. Sets marked private stay hidden unless you share the link directly. Public sets appear in Blooket’s search, so anyone including teachers can find them. Check your privacy settings before publishing if you want to control who accesses your work.
Deleting a game is straightforward. Go to your sets dashboard, click the three dots next to the set you want to remove, and select delete. The game disappears immediately, so make sure you really want it gone before confirming. You can’t recover deleted sets, so save a backup copy if you might need the questions later.
You’ve now got everything you need to create your own Blooket games and turn study sessions into something your classmates actually look forward to. Start small, maybe just 10 questions on your next vocab quiz or science unit, and you’ll be surprised how quickly you get the hang of it. The more you create, the easier it becomes to spot what makes a great game versus an okay one.
Remember, Blooket isn’t your only option for interactive review. Blooket-Style Word Association Game Templates work perfectly when your school’s internet is down or you want a quick no-tech backup that still brings that same competitive energy to the classroom. Whether you’re hosting a live Blooket match or passing around printed word cards, you’re taking charge of your learning in a way that actually sticks. Now go build something fun.