
How to Use Scaffolding in Teaching to Build Standards-Aligned Skill Progressions
Scaffolding in teaching means building a clear, step-by-step skill progression that moves students from what they already know to grade-level mastery. Instead of hoping students will “get it” or simply re-teaching the same standard when they struggle, you intentionally sequence prerequisite skills in your lesson plans so every student can access the learning target. This approach takes about 15 minutes of planning per lesson once you identify the foundational skills, and it transforms how students experience new content.
Too many lessons fail because we skip the bridge between where students are and where they need to be. You introduce multi-digit multiplication, but half the class still struggles with place value. You assign a persuasive essay, but students never mastered writing a clear claim. The result? Frustration, behavior problems, and that nagging feeling you’re moving too fast while also falling behind. Scaffolding solves this by breaking complex standards into manageable chunks and teaching each piece in sequence.
The process works because it mirrors how the brain actually learns. Students need to anchor new information to existing knowledge. When you fix curriculum gaps before introducing grade-level content, you’re not lowering expectations. You’re building the foundation that makes higher-level thinking possible.
This guide walks you through exactly how to identify prerequisite skills, sequence them into your lessons, customize practice activities, and verify that scaffolding is actually working. You’ll avoid the most common mistakes (like over-scaffolding or removing supports too early) and learn when to fade support so students build independence. Best of all, you can start using these strategies in your next lesson.
What You’ll Need to Get Started
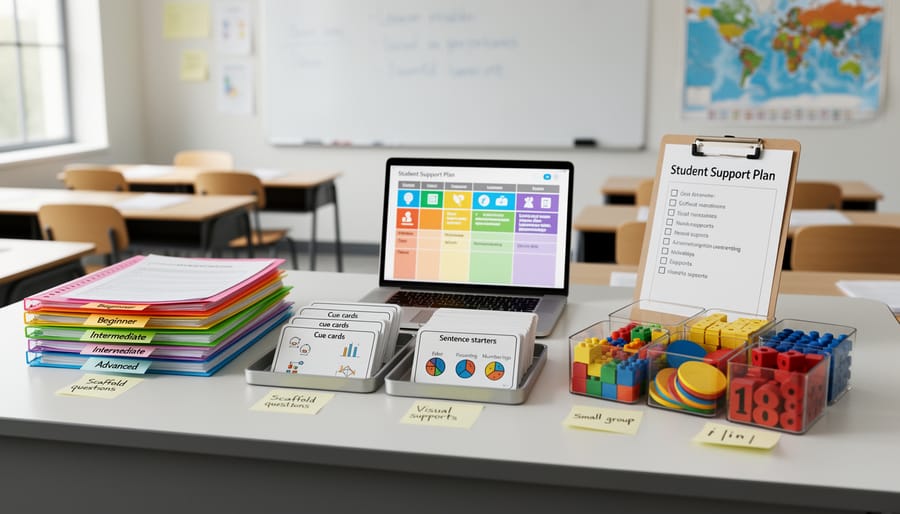
Before you dive into building your scaffolded lesson sequence, let’s gather the tools that’ll make the process smooth and successful. The good news? You probably already have most of these on hand, and the rest are easy to access or create.
Here’s what you’ll want to have ready:
- Your grade-level standards documents (state or Common Core) with mastery criteria clearly outlined
- Curriculum maps or pacing guides that show how skills build across units and the year
- Formative assessment tools like exit tickets, quick quizzes, or observation checklists to gauge current skill levels
- Graphic organizers and visual supports (charts, sentence frames, vocabulary maps) that you can customize for different skill levels
- Engaging review materials such as interactive game templates, flashcard sets, or collaborative activities
- A planning template or notebook where you can map prerequisite progressions and track scaffold removal
Think of these materials as your scaffolding construction kit. The standards documents and curriculum maps help you identify the destination and pathway. Your formative assessments show you exactly where students are standing right now, so you’re not guessing about gaps. The graphic organizers and visual supports become the temporary bridges students use while building new skills.
And here’s where customization becomes your secret weapon: tools like our PowerPoint game templates let you turn prerequisite practice into something students actually look forward to. You can adjust difficulty levels, swap in vocabulary that matches your unit, and create review opportunities that feel like play rather than drill. When scaffolding includes elements of fun and choice, students engage more deeply and retain skills better. Gather what you have, bookmark what you need, and you’re ready to start building those skill progressions with confidence.
Watch Out for These Scaffolding Mistakes

Even well-intentioned scaffolding can backfire when common mistakes creep in. Let’s make sure you sidestep these pitfalls and keep your students moving forward.
Over-scaffolding creates comfortable learners who depend on your supports instead of building independence. If you’re still providing sentence frames in week five for a skill students mastered in week two, you’re doing the work they should be practicing. The goal is temporary support, not permanent crutches.
Skipping prerequisite checks lands you in guesswork territory. You can’t scaffold effectively if you don’t know where students actually are. That quick entrance ticket or review game isn’t busywork, it’s your roadmap for which supports to deploy and which students need them.
Misaligned scaffolds waste everyone’s time. A graphic organizer that targets vocabulary won’t help students who struggle with sequencing. Match your supports precisely to the skill gap you’ve identified, not to a generic scaffold you like using.
Pulling scaffolds too fast frustrates students and tanks their confidence. Fading support should follow evidence of growing independence, not your lesson plan calendar. If formative checks show students still need the scaffold, keep it in place. Rushing removal just to stick to a timeline sets students up to stumble right when they’re gaining momentum.
Step-by-Step: Creating Your Scaffolded Lesson Sequence
Step 1: Identify Your End-of-Lesson Standard
Start with the finish line. Before you build any scaffolds, you need a crystal-clear picture of where your students are headed. Grab your grade-level standards document and pinpoint the specific standard your lesson addresses. Don’t just skim it, really read what it’s asking students to do.
Now make it concrete. What does mastery actually look like in student work? If the standard says “students will analyze,” what will they analyze, and what will their analysis include? Turn abstract language into observable actions. For example, instead of “understand fractions,” you might define mastery as “students will compare two fractions with different denominators by finding a common denominator and explaining which is larger.”
Write down your success criteria in student-friendly language. What will students be able to say, write, or demonstrate by the end of the lesson? Be specific enough that you could show a student example and a non-example. This clarity becomes your North Star for every scaffolding decision you make next.
Step 2: Map the Prerequisite Skill Progression
Once you’ve clarified your target standard, it’s time to work backward and map out every skill your students need to reach it. This is where the magic of scaffolding really happens, you’re building a skill ladder that moves logically from foundational concepts to grade-level mastery.
Start by asking yourself: What must students already know to succeed with this standard? Then ask it again for each skill you identify. You’re peeling back layers until you hit bedrock, the truly foundational skills most of your students should have. Here’s how to do it systematically:
- Write your target standard at the top of a blank page or digital document.
- Directly below it, list the immediate prerequisite skills needed to access that standard, the skills one step down.
- For each skill you just listed, ask: What comes before this? Write those supporting skills underneath.
- Continue this backward mapping until you reach skills most students likely mastered in earlier grades.
- Review your ladder from bottom to top to confirm each skill logically builds to the next.
Your finished progression should read like steps on a staircase, each one supporting the next. If a skill feels like a leap rather than a step, you’ve probably skipped something, add that missing rung. Don’t worry about perfection; you can adjust as you teach. The goal is a clear, teachable path from where students are to where they need to be.
Step 3: Assess Where Students Are Right Now
Before you can build the right scaffolds, you need to know exactly where your students stand. Skip this step, and you’ll waste time teaching skills they’ve already mastered or building supports that don’t address their actual gaps.
Start with a quick diagnostic that targets the prerequisite skills you mapped in Step 2. Entrance tickets work beautifully here, pose two or three short problems that require students to apply each foundational skill independently. A five-minute check at the door tells you who’s ready, who needs support, and where the gaps cluster.
Review games offer another powerful option. Turn your diagnostic into a low-stakes team challenge using a customizable game template. Students relax, you gather real-time data on who struggles with which skills, and the energy stays positive. Watch for patterns: if most students miss the same skill, that’s your starting point.
Formative assessment guides instruction most effectively when it’s quick, frequent, and tied directly to your standards-aligned assessment plan. Don’t overthink it, a simple thumbs check, exit slip, or whiteboard flash can reveal who’s ready to move forward and who needs another round of practice before tackling the next level.
Step 4: Design Temporary Supports for Each Skill Level
Now that you know where your students stand, it’s time to design the temporary supports that will bridge the gap between their current skills and your target standard. Think of scaffolds as training wheels, helpful for now, but designed to come off when students are ready to ride solo.
Start by matching each scaffold to a specific skill level. If students struggle with prerequisite skill A, create a graphic organizer that breaks the process into visual steps. For skill B, develop sentence frames that give them language structures to lean on. Worked examples are gold here, show students exactly what success looks like, then have them try a nearly identical problem with you, then one on their own.
Don’t forget peer supports. Pair students strategically so they can talk through problems together. Sometimes hearing an explanation from a classmate clicks better than hearing it from you.
Here’s where the fun comes in: game-based practice is one of the most engaging scaffolds you can use. Turn skill practice into team challenges or review competitions using customizable lesson-planning materials like PowerPoint game templates. Students practice prerequisite skills without the pressure of a graded assignment, and you get real-time data on who’s ready to move forward.
The key is variety. Mix visual supports with verbal ones, independent practice with collaborative work, and serious tasks with playful review. When scaffolds feel like helpful tools instead of remediation, students use them willingly.
Step 5: Plan Your Gradual Release of Support
Once you’ve put scaffolds in place, the magic happens when you fade them at just the right moment, not too soon, and definitely not so late that students become dependent on the support.
Start by setting checkpoints based on what students can actually do, not calendar dates. For example, “I’ll remove sentence frames when 80% of students can generate complete responses on two consecutive exit tickets.” That’s data-driven. Saying “We’ll stop using graphic organizers after Friday” is a guess that ignores what kids truly need.
Create a simple tracking system. Note which scaffolds you’re using for each skill level and tie removal to observable benchmarks: consistent accuracy, faster task completion, or students self-correcting without prompts. When three formative checks show mastery, it’s time to pull back.
Fade gradually, not abruptly. If students rely on a worked example, try providing only the first step next time, then just a hint, then nothing. Think of it as turning down the volume on a song rather than hitting stop.
Keep one scaffold longer than others if needed, every class is different. Trust your data and your instincts, and celebrate each scaffold you successfully remove. That’s proof your students are growing.
Step 6: Build in Engaging Practice Opportunities
Once students understand each prerequisite skill, they need fun, repeated practice to cement it. Don’t rely on worksheets alone, use review games that work team challenges, and interactive PowerPoint templates that target specific skills in your progression. Low-stakes competitions let students apply what they’ve learned without fear of failure, building confidence and fluency before you assess mastery.
How to Know Your Scaffolding Is Working
You’ll know your scaffolding is effective when students start demonstrating skills independently that they couldn’t manage alone before. Watch for students who initially relied on sentence frames now writing responses without them, or learners who needed worked examples tackling similar problems on their own. These shifts signal readiness for the next level.
Monitor progress through quick daily checks: exit tickets, observation notes during practice, or short game-based reviews where you can see who’s applying skills confidently. If most students consistently succeed without prompting or support materials, your scaffolds are doing their job. If they’re still hesitant or making the same errors, they need more time with current supports before moving forward.
Signs you can start fading scaffolds include students self-correcting without your intervention, completing tasks faster, and helping peers who are still learning. Remove supports gradually, maybe reduce the graphic organizer’s detail or offer sentence frames as optional rather than required, and watch how students respond.
When students still struggle after multiple practice opportunities, pause and check curriculum fit to ensure your prerequisite skills truly align with the standard. You might need to add an intermediate step you initially skipped, provide a different type of support that better matches their learning style, or give more low-stakes practice through engaging review activities before expecting mastery.
Celebrate every win, students mastering a tricky prerequisite, a whole group moving to less support, or one learner showing sudden confidence. Recognition fuels motivation and reminds everyone that progress is the goal, not perfection.
Quick Wins: Scaffolding Strategies You Can Use Tomorrow
You don’t need a complete lesson overhaul to start scaffolding effectively. These strategies slot right into your existing plans and give students the support they need without requiring hours of prep.
Think-Alouds During New Concepts: Model your problem-solving process out loud as you work through an example. Say exactly what you’re thinking, including the questions you ask yourself and the mistakes you catch. Students hear the invisible thinking that experts do automatically, and it demystifies the skill you’re teaching.
Visual Supports That Stay Visible: Post anchor charts, process maps, or vocabulary walls that students can reference throughout the lesson. Keep them up during independent work so kids can self-check without asking for help every two minutes. Color-code steps or use icons to make them even more accessible.
Here are five more scaffolds you can implement right away:
- Sentence frames for written responses that provide structure without giving away the answer
- Peer modeling where a student demonstrates the skill while you narrate what they’re doing well
- Tiered questioning that starts simple and builds complexity based on student responses
- Worked examples with annotations showing each step and why it matters
- Game-based review using customizable templates that let students practice prerequisite skills in a fun, low-pressure format
The beauty of these strategies is that you can mix and match based on what your students need in the moment. Start with one or two, see what clicks, and build from there. You’re not adding more to your plate, you’re making what’s already there work harder for your kids.
Common Questions About Scaffolding and Skill Progressions
How is scaffolding different from differentiation?
Scaffolding provides temporary supports that you gradually remove as students build independence toward a single standard, while differentiation adjusts the content, process, or product to meet varied learner needs simultaneously. Think of scaffolding as training wheels you take off; differentiation is offering different routes to the same destination.
How many prerequisite skills should I target in one lesson?
Focus on two to three prerequisite skills max. Trying to address too many at once overwhelms students and dilutes your instruction. If your standard requires more foundational work, spread it across multiple lessons.
Can I scaffold group work and collaborative activities?
Absolutely. Use role cards, sentence starters for discussion, visual task checklists, and structured protocols to scaffold collaboration. Games with team roles naturally scaffold group work while keeping students engaged and accountable.
When should I remove scaffolds?
Remove supports when formative assessment shows students can perform the skill independently at least 80% of the time. Pull back one scaffold at a time rather than all at once, and watch for signs of struggle that signal you moved too fast.
Teachers also wonder how review games fit into scaffolded lessons. Games provide low-stakes practice environments where students can apply prerequisite skills without the pressure of graded assessments. Customizable game templates let you target exact skills in your progression, making practice feel motivational rather than repetitive. Students get immediate feedback, multiple attempts to succeed, and the confidence boost that comes from mastering foundational skills before tackling harder content.
Another common question centers on time constraints. You don’t need hours of extra planning to scaffold effectively. Start by identifying just one or two prerequisites for your next lesson, create one simple support like a graphic organizer or sentence frame, and use a five-minute review game to check understanding. Small, strategic scaffolds deliver better results than elaborate systems you can’t sustain.
Thoughtful scaffolding transforms how students reach standards mastery. When you build those prerequisite skill progressions intentionally and support learners at each step, you’re not just teaching content, you’re building confidence and independence. And here’s the thing: you don’t have to overhaul everything at once. Pick one upcoming lesson, map the skills, add a scaffold or two, and see what happens.
Our customizable game templates make that scaffolded practice genuinely fun and manageable. No extra prep overwhelm, just engaging tools that let students practice skills while you monitor their progress. You’ve got this. Start small, celebrate the wins, and watch your students climb that skill ladder with you cheering them on every step of the way.