How to Build ELL Scaffolds for Multilingual Classroom Games
ELL scaffolds are temporary supports built into classroom activities that help English language learners access content while they’re still developing language skills. In the context of review games, these scaffolds give students the visual cues, sentence frames, and processing time they need to participate fully without watering down the academic challenge.
Most classroom games move fast, and that speed can accidentally sideline the very students who’d benefit most from the engagement. Your multilingual learners aren’t struggling with the content itself, they’re racing against vocabulary recall and sentence construction while the timer counts down. The fix is straightforward: layer in strategic supports that bridge the language gap without changing your game template or splitting kids into separate activities.
Think of scaffolds as training wheels. You add them when needed, adjust them as students grow stronger, and remove them when they’re no longer necessary. The beauty of building these supports into games is that they feel invisible to students. A visual word bank doesn’t announce “this is for the ELL kids”, it just makes the game more accessible for everyone.
The goal here is participation, not perfection. When your English learners can jump into a Jeopardy-style review or a vocabulary relay without freezing up or relying entirely on peers to carry them, you know your scaffolds are working. This guide walks you through the specific materials, setup steps, and quick checks that turn any review game into an inclusive learning experience where language develops through play.
What You’ll Need: Tools and Materials for Building ELL Game Scaffolds
Building ELL scaffolds doesn’t require specialized software or expensive resources. You probably already have most of what you need in your existing classroom toolkit, and the beauty of scaffolding review games is that the structure does much of the heavy lifting for you.
Here’s what you’ll need to get started:
- Editable PowerPoint or Google Slides game templates (the kind you’re already using for Jeopardy, quiz shows, or board game formats)
- Digital or printed image libraries (free sources like Unsplash, Pixabay, or your school’s licensed clipart collection work perfectly)
- Translation tools such as Google Translate or bilingual dictionaries for your students’ home languages
- Word association list templates (simple Word or Excel documents where you’ll map academic vocabulary to familiar terms)
- Organizational materials like folders or digital files to store your customized scaffolds by unit or theme
The game templates themselves become your scaffolding framework. Most review game PowerPoints already include editable text boxes, image placeholders, and customizable slides where you can layer in visual supports, glossaries, and sentence starters. You’re not creating something from scratch, you’re enhancing what already works.
Keep a running collection of images organized by subject area. When you need a visual cue for “photosynthesis” or “democracy,” you’ll have it ready. The same goes for your word lists: build them as you teach each unit, then reuse and refine them across multiple games throughout the year.
Translation tools help you add native language bridges, but use them as supplements rather than replacements for English instruction. Your goal is accessibility, not avoiding English practice. Store everything in clearly labeled folders so you can pull scaffolds quickly when planning your next review game.

Safety Considerations for Inclusive Language Learning
Creating a safe space for ELL students during classroom games isn’t just about physical safety, it’s about protecting their confidence and willingness to participate. When language learners feel pressured or exposed, they shut down, and your carefully planned review game becomes an anxiety trigger instead of a learning opportunity.
Start by removing time pressure wherever possible. Timed rounds create unnecessary stress for students who are translating in their heads while trying to recall content. Instead, give teams think-time or allow students to phone-a-friend within their group before answering. This simple adjustment transforms games from nerve-wracking speed contests into collaborative problem-solving experiences.
Avoid singling out ELL students for special treatment during gameplay. Don’t announce modified questions or point out that certain supports are “for our English learners.” Just build differentiated options into the game structure where all students can access them naturally. Use visual answer banks for everyone, not just ELL students, this inclusive design benefits visual learners across the board and removes any stigma.
Watch your language when students struggle. Never say “Just try in English” or highlight what they can’t do. Instead, celebrate what they can express and build from there. If a student gives a one-word answer when you hoped for a sentence, accept it, expand on it yourself as a model, and move forward. Your goal is participation and comprehension, not perfect English production during a review game.
Step 1: Create Your ELL Word Association Lists
Start by identifying the 5-10 academic terms your students absolutely need to understand to play your review game successfully. These are your anchor words, the vocabulary that appears in questions, instructions, or game content. Write them down first, then build bridges from each term to concepts your ELL students already know.
For each anchor word, create three types of connections. First, list 2-3 simpler English words that relate to the target term. If your anchor word is “evaporate,” connect it to “dry up,” “disappear,” and “turn into air.” Second, add a visual description or sketch idea, something concrete students can picture. For evaporate, that might be “puddle disappearing in sun” or “steam rising from pot.” Third, if you know your students’ native languages, include direct translations or cognates. Spanish-speaking students will recognize “evaporar” immediately.
To build your lists systematically:
- Circle the 5-10 essential vocabulary words in your game content that ELL students might struggle with
- For each word, brainstorm 2-3 familiar English synonyms or related terms students already know
- Write a brief visual description or find a simple image that represents the concept
- Add native language translations for your students’ primary languages (use Google Translate as a starting point, but verify with bilingual colleagues when possible)
- Organize your completed lists by difficulty, put foundational terms first, more complex vocabulary last
Group your words by theme rather than alphabetically. If you’re reviewing a science unit, cluster terms by concept: water cycle words together, weather terms together, measurement vocabulary together. This thematic organization helps students see relationships between terms and builds comprehension faster than random lists.
Keep your lists short and focused. Ten well-scaffolded words with strong connections work better than thirty terms with weak support. You can always add more lists as students gain confidence, but starting lean prevents overwhelm and keeps your game moving at an engaging pace.

Step 2: Layer Visual and Linguistic Supports Into Your Game Template
Once your word association lists are ready, it’s time to weave those supports directly into your game template. The goal is to make scaffolds part of the game structure itself, not afterthoughts on separate handouts. PowerPoint’s flexibility lets you build layers of support that students can access during play without slowing down the game flow.
Start by creating an image bank slide at the beginning of your game template. This works like a visual dictionary: for key vocabulary in your review questions, add a slide with labeled pictures, icons, or simple drawings. Students can reference this “cheat sheet” during gameplay. If you’re running a Jeopardy-style game about ecosystems, your image bank might show a food chain diagram, pictures of producers and consumers, and arrows showing energy flow. Keep images clear and labeled in large font.
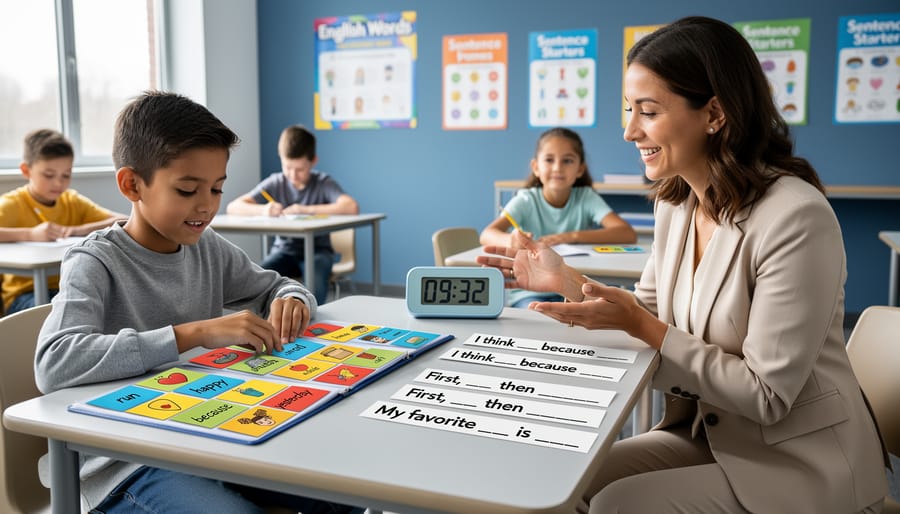
Next, embed sentence frames directly onto your question slides. Instead of asking “What is photosynthesis?” as a bare question, add a sentence starter underneath: “Photosynthesis is when plants use _____ and _____ to make _____.” This gives ELL students the language structure they need to formulate an answer, turning recall into a fill-in-the-blank task that still requires understanding. For team games, you can include multiple frame options at different complexity levels.
Build your scaffolds as distinct, accessible elements within each game round:
- Visual aids: icons or photos paired with each question
- Sentence starters: “I think the answer is _____ because _____”
- Word banks: three to five relevant vocabulary terms at the bottom of slides
- Gesture cues: simple illustrations showing actions related to concepts
- Example answers: sample responses on a separate “help” slide students can request
Use color coding to differentiate support levels. Assign one color (say, green) to beginner scaffolds, another (yellow) to intermediate supports, and keep advanced questions in a neutral color. Teams can choose their color level before each turn, promoting self-advocacy and reducing anxiety about admitting they need help.
For multilingual glossaries, add a small text box to the corner of relevant slides with translations of the three to five hardest terms in your students’ native languages. You don’t need to translate everything, just the words that unlock comprehension. Digital translation tools make this quick, and you can reuse these glossaries across multiple games on the same topic.
The customization happens in editing view. Add text boxes, insert images from your files, adjust font sizes, and group elements so your slides stay organized. Test navigation by running the slideshow to confirm students can find supports quickly without hunting through cluttered screens.
Step 3: Differentiate Support Levels for Mixed-Proficiency Classrooms
Not every ELL student needs the same level of support, and that’s perfectly okay. Your multilingual classroom game can accommodate beginners through advanced learners by building three distinct support tiers into one template.
Start by creating three color-coded question categories within your game. Green questions include full scaffolds: visual cues, sentence frames, and word bank options. Yellow questions offer moderate support with images and partial prompts but require students to construct more of their response independently. Red questions challenge advanced learners with minimal scaffolding, relying primarily on content knowledge they’ve built through earlier practice.
Assign students to mixed-proficiency teams rather than grouping by language level. This lets beginners hear academic vocabulary used in context by peers while advanced learners reinforce their skills through explanation. Give each team member a specific role: the recorder writes answers, the reader states them aloud, the researcher checks word lists, and the strategist decides which questions to attempt. Rotate these roles so everyone practices different language skills.
Build optional support slides into your game template that teams can access when needed. These bonus slides might show a vocabulary chart, a visual timeline, or example sentences using key terms. Teams decide whether to “spend” a turn viewing a support slide, creating a strategic element that keeps advanced learners engaged while providing a safety net for those who need it.
Adjust point values to match difficulty levels. Green scaffolded questions earn fewer points, yellow questions offer moderate rewards, and red challenge questions provide the highest payoff. This motivates students to stretch just beyond their current comfort zone without forcing anyone into frustration territory.
Step 4: Test and Adjust Your Multilingual Game Scaffolds
Your scaffolded game won’t be perfect the first time, and that’s completely okay. The real magic happens when you pilot it with your students, watch what works, and tweak what doesn’t.
Start with a low-stakes trial run. Pick a review session where the content isn’t brand new and the pressure is minimal. Tell students upfront that you’re testing a new game format and you want their honest feedback about what helps them understand and participate. This transparency builds trust and turns students into collaborators rather than test subjects.
During gameplay, position yourself where you can observe the whole room. Watch who jumps in immediately, who hesitates before answering, and who stays silent. Are your beginning ELL students using the visual aids you provided? Are intermediate learners checking the sentence frames or ignoring them? Notice if students naturally reach for their word association lists or if those papers sit untouched on desks. Body language tells you plenty: leaning forward signals engagement, crossed arms or blank stares suggest confusion or overwhelm.
After the game, gather quick feedback while the experience is fresh. Ask direct questions: “Which supports helped you the most? What felt confusing? Was anything too easy or too hard?” Younger students might need sentence starters like “I liked _____ because _____” or “I wish there was _____.” Older learners can provide written reflections or participate in a brief class discussion.
Pay attention to warning signs that scaffolds need adjustment. If beginning ELL students never volunteer answers even with full support, your scaffolds might still be too complex or not visible enough. If advanced learners finish every round in seconds, they need more challenge and fewer supports. Students asking the same clarifying question repeatedly signals that instructions or word lists need clearer language or better visuals.
Common fixes are simpler than you’d think. Add more images if students seem lost. Reduce text density if they’re not reading the supports. Create a quick reference sheet if they keep flipping through multiple resources. Sometimes the issue is pacing: ELL students might need five extra seconds of think time before answers are called out.
Keep notes on what you change and why. Jot down “added color coding to vocabulary tiers” or “moved word lists to larger font” so you remember what worked when you use this game again next month. Your scaffolded games will get stronger with each iteration, and your students will benefit from your willingness to learn alongside them.

Practical Examples: Scaffolds for Popular Game Formats
Let’s look at how these scaffolds work in real classroom games you already use.
Jeopardy-Style Review Games
For a science Jeopardy game on ecosystems, add a visual bank slide before questions. When “producer” appears in a clue, your scaffold slide shows pictures of plants, algae, and trees with labels underneath. Beginning ELL students can refer back to this slide during gameplay. For intermediate learners, include sentence frames on answer slides: “A _____ is a producer because _____.” Advanced students might only need the visual bank without sentence support.
Create categories with different support levels built in. A “Vocabulary Match” category pairs academic terms with images, while a “True or False” category offers simpler language structures that all proficiency levels can access.
In board games where students move spaces by answering questions, assign team roles that match language proficiency. Your beginning ELL student becomes the “Visual Checker” who confirms answers using picture cards. Intermediate learners serve as “Sentence Builders” who use frames to explain answers. Advanced students take “Challenge Questions” with minimal support.
Provide each team with a laminated reference sheet showing key vocabulary with images, cognates in their languages, and example phrases. Teams earn bonus moves for using scaffold materials to build complete explanations rather than one-word answers.
Frequently Asked Questions About ELL Game Scaffolds
How much support is too much?
You’ve provided too much support when students can complete the game without engaging with the target content or practicing new vocabulary. If students simply read pre-written answers instead of processing meaning, scale back by removing complete sentences and leaving only visual cues or single keywords.
When should I start removing scaffolds?
Begin fading scaffolds when you notice students glancing at supports but not needing them to participate successfully. Remove one layer at a time rather than all at once, starting with the most explicit supports like full translations while keeping visual aids and sentence frames available longer.
What if students rely too heavily on native language translations?
Transition to visual-first scaffolds and require students to explain their thinking in English, even if it’s just a phrase or short sentence. Make the native language support a secondary reference rather than the primary tool by reducing its prominence in your game layout.
How do I balance challenge with accessibility for mixed proficiency levels?
Build choice into your game structure so students can select their support level, like offering “helper cards” that provide different amounts of detail or allowing teams to decide whether to use the vocabulary bank. This puts learners in control of their own challenge level while keeping everyone engaged with the same content.
Should all students have access to the same scaffolds?
Yes, make scaffolds available to everyone rather than marking them as “only for ELL students,” which can create stigma. Native English speakers often benefit from visual supports and vocabulary clarification too, and universal access normalizes using help when needed.
The key to effective scaffolding is observation. Watch how students interact with your supports during gameplay, noting who uses what and when. If a student repeatedly chooses the most detailed support option but participates enthusiastically and learns the content, that’s success, not over-dependence. Your goal isn’t to eliminate scaffolds quickly but to build confidence and comprehension that eventually makes heavy supports unnecessary. Some students will need visual aids longer than others, and that’s completely normal in a multilingual classroom.
Starting with just one scaffolded game changes everything. Pick your class’s favorite review activity, add a word association list and a few visual supports, and watch what happens. You’ll notice ELL students leaning in instead of staying quiet. You’ll see hands going up where there was hesitation before. That’s the power of making games accessible.
The beautiful part? Scaffolds don’t just help English learners, they benefit everyone. Visual cues aid memory for all students. Sentence frames give structure to those still building academic language skills, regardless of their native language. Multilingual supports create a classroom culture where language diversity becomes an asset, not an obstacle.
Your customizable game templates already give you the foundation. The scaffolding techniques we’ve covered fit right into the PowerPoint slides you’re already using. No need to rebuild from scratch or master complicated tools.
Your multilingual classroom deserves review games where every student can shine. Start small, celebrate the wins, and keep building. You’re not just teaching content, you’re showing students that their languages, their backgrounds, and their voices matter in your learning space.