How to Design a PowerPoint Escape Room Game for Your Classroom
You can build a PowerPoint escape room game for your classroom in about 2-3 hours using nothing more than PowerPoint’s hyperlink feature, a clear storyline, and a series of puzzles that unlock through correct answers. This method transforms static slides into an interactive, self-checking adventure where students click their way through challenges, instantly seeing whether their solutions move them forward or send them to a try-again screen.
The beauty of PowerPoint escape rooms lies in their simplicity and flexibility. You don’t need coding skills or expensive software. Instead, you’ll use basic shapes, text boxes, and hyperlinks to create branching pathways that mimic the thrill of a physical escape room. Wrong answers loop students back to retry, while correct ones advance the story and reveal new clues. This self-paced format works beautifully for review sessions, early finishers, or small group rotations.
The payoff goes beyond engagement. These digital escape rooms let you customize every puzzle to your curriculum, adjust difficulty on the fly, and reuse the same template across units by simply swapping out questions. Whether you’re reviewing multiplication facts or exploring historical events, the game mechanics stay consistent while the content changes. Your students get immediate feedback, you get a reusable resource, and everyone experiences learning that feels more like play than practice.
What You’ll Need to Get Started
PowerPoint Version and Compatibility
Most PowerPoint versions from 2013 onward work perfectly for escape room games. You’ll get the best results with PowerPoint 2016 or later, which handles hyperlinks and animations more reliably. The free online version of PowerPoint also works, though it has fewer animation options.
Before building your game, check what version runs on your classroom computers or student devices. If you’re creating on a Mac but students use Windows PCs, test your game on both systems, animations and fonts sometimes shift between platforms.
Save your file as a .pptx (not .ppt) to maintain compatibility. If students will play on tablets or Chromebooks, test there first since touch navigation works differently than mouse clicks. Keep a backup copy on a USB drive in case you need to troubleshoot quickly during class.
Content Preparation Tips
Before you open PowerPoint, gather your content in one place. Pull together the review questions, vocabulary terms, or concepts you want students to practice. Write out correct answers and common wrong answers that make sense as distractors. If you’re using riddles or codes, draft those alongside their solutions so you can see what works. Organizing everything in a simple game design document saves time later when you’re building puzzle slides. You’ll also want to decide on a theme or story that ties the puzzles together, even if it’s just “escape the ancient tomb” or “crack the secret lab code.” This upfront planning keeps your game focused and prevents you from scrambling mid-build when you realize you need three more clues.
Important Setup Considerations Before You Begin
Before you dive into building, a quick tech check saves major headaches. Test your finished game on the exact devices students will use, classroom projectors, laptops, or tablets, because hyperlinks and animations sometimes behave differently across PowerPoint versions or operating systems. Run through every clickable element to confirm links go where they should and nothing freezes mid-game.
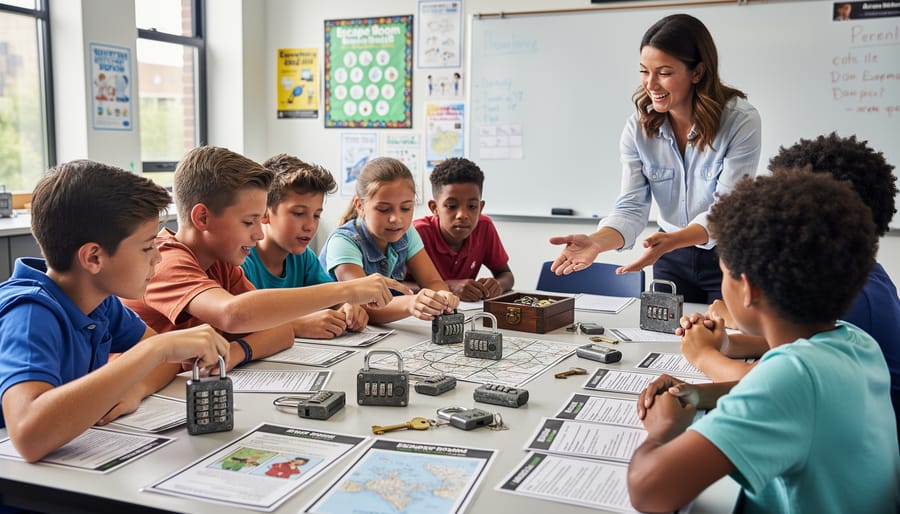
Competitive escape rooms can spark incredible energy, but they can also trigger arguments over who clicks next or accusations of cheating. Establish clear team roles upfront and use strategies to stop students shouting over answers. Consider assigning a “navigator” who clicks, a “scribe” who tracks clues, and a “timekeeper” who watches the clock.
Accessibility matters for every learner in your room. Follow creating accessible presentations guidelines: use high-contrast text, readable fonts (18pt minimum), and alt text for images so screen readers work. If you teach multilingual students, plan for language localization by keeping instructions simple and visual-heavy. Build in extra time for students with processing needs, not every team has to finish simultaneously for the game to succeed.
Step-by-Step: Building Your PowerPoint Escape Room
Step 1: Set Up Your Game Structure and Story
Open PowerPoint and start with a blank presentation. Your first slide is your game’s front door, make it count. Add a title that sets the scene, like “Escape the Ancient Library” or “Mission: Math Code Breakout.” Keep it simple but intriguing enough to hook your students immediately.
Below the title, write 3-4 lines of story setup: “The classroom door has locked! Solve five math puzzles to find the exit code before time runs out.” This narrative hook transforms review questions into an urgent mission. Students aren’t just answering problems, they’re racing against the clock.
Next, create a second slide showing your game map or room layout. This can be as basic as numbered boxes (Puzzle 1, Puzzle 2, etc.) arranged in a grid, or you could sketch a simple floor plan with clickable areas. Use shapes from the Insert menu to build this, rectangles work perfectly for puzzle stations. Label each station clearly so students know where they are in the sequence.
Add one final slide with game rules: time limit, team size, hint policy, and what happens when they solve everything. Now you’ve got your foundation ready.
Step 2: Create Puzzle Slides and Challenges

Now comes the fun part, transforming your review content into puzzles students will actually want to solve. Think of each puzzle slide as a mini-challenge that reinforces what you’ve taught while keeping the escape room excitement alive.
Start by choosing the right puzzle type for your content. A vocabulary review works beautifully as a lock-and-key mechanic: students match terms to definitions to “unlock” the next room. Math problems fit perfectly into code-breaking puzzles where correct answers reveal a number sequence. Historical timelines become sequencing challenges where events must be placed in order.
Create one slide per puzzle. Add your question or challenge at the top, then build in multiple-choice answers as clickable shapes or text boxes. For a four-digit lock puzzle, you might ask four review questions, with each correct answer revealing one digit. For a riddle-based challenge, phrase your review question as a clue: “I’m the process plants use to make food, what am I?”
Keep three to five puzzles for a 20-minute game. Too many overwhelms; too few finishes too quickly. Make early puzzles easier to build confidence, then increase difficulty as students progress toward escape.
Use PowerPoint’s shapes to create visual puzzle elements. Insert rectangles as “locks,” format text boxes as “keypads,” or add images that students click to reveal hidden clues. The visual variety keeps engagement high while reinforcing your actual learning objectives.
Step 3: Add Hyperlinks and Navigation
Now it’s time to connect your puzzle slides so students can actually navigate through your escape room. This is where your game comes to life, linking choices to outcomes and building pathways between challenges.
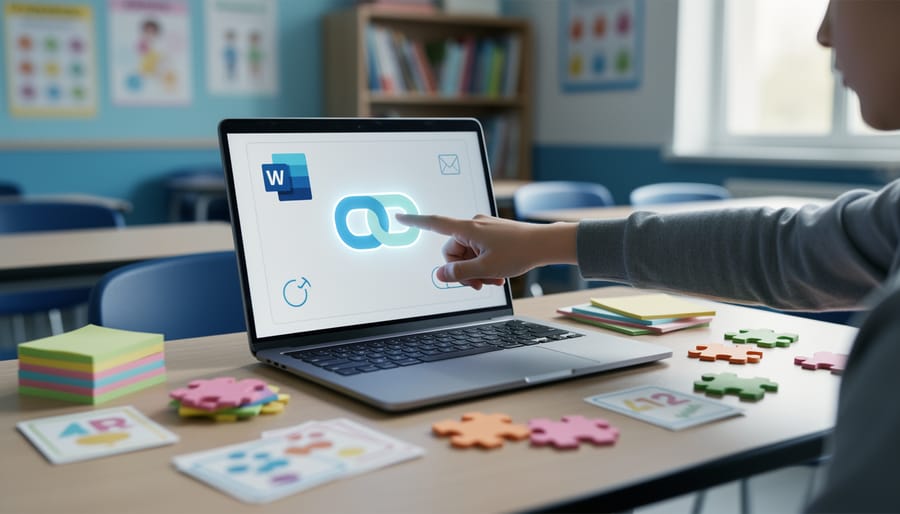
Start with your first puzzle slide. Highlight the text or shape that represents a correct answer, then click Insert > Link (or press Ctrl+K). In the dialog box, choose “Place in This Document” and select the slide where you want students to land, usually a “Correct!” feedback slide. Repeat this process for incorrect answers, linking them to a gentle feedback slide that redirects students back to try again.
For wrong answer slides, add a “Try Again” button that hyperlinks back to the puzzle slide so students can make another attempt. On correct answer slides, create a “Next Puzzle” button linking to the following challenge. This creates a smooth flow from puzzle to feedback to the next room.
Use shapes like rectangles or arrows for navigation buttons instead of plain text, they’re easier for students to spot and click. Format them consistently throughout your game so students always know where to click next.
Test every single link as you build. Click through each pathway to make sure correct answers advance the story and wrong answers loop back appropriately. Nothing kills momentum faster than a broken link that sends students to the wrong slide.
Consider adding a subtle “Menu” or “Start Over” button in the corner of each slide for groups that get completely stuck and need to reset.
Step 4: Insert Feedback and Hint Systems
A well-designed hint system keeps students moving forward without giving away answers. Create a “Hint” button on each puzzle slide that hyperlinks to a dedicated hint slide. This slide should offer a gentle nudge, maybe remind them which chapter the answer comes from or highlight a key word in the clue they might have overlooked. Always include a “Back to Puzzle” button so students can return and try again.
For wrong answers, build short feedback slides that acknowledge their effort while redirecting their thinking. Instead of just saying “Incorrect,” try “Not quite! Remember to check the units in the problem” or “Close! Think about the order of events.” These slides should feel like a helpful coach, not a dead end.
When students solve a puzzle correctly, celebrate it! Your feedback slide can include animations, a sound effect, or a message like “Lock opened! Moving to the next room…” This positive reinforcement keeps energy high. Then hyperlink directly to the next puzzle so momentum continues.
Keep all feedback slides consistent in format, students should quickly recognize whether they’re seeing a hint, wrong answer, or success message just by the slide’s appearance.
Step 5: Customize with Visuals and Sound
Now comes the fun part, turning your working game into an immersive experience. Start by choosing a consistent color scheme and font pairing that matches your escape room theme. If you’re doing a spy mission, use bold blacks and reds; a haunted house works well with purples and muted greens.
Add visuals to every slide. Use copyright-free images from sites like Unsplash or Pixabay, or stick with PowerPoint’s built-in stock photos. Place background images carefully so text remains readable, use semi-transparent shapes behind text if needed.
Animations create excitement. Apply entrance animations to puzzle elements so they appear one at a time rather than all at once. Use emphasis animations on correct answers to celebrate success. Keep transitions consistent between slides, a simple fade or push works better than flashy effects that distract from the content.
Sound effects amp up engagement. Add a satisfying chime for correct answers and a gentle buzz for wrong ones. PowerPoint lets you embed audio files directly, just click Insert, Audio, and choose your file. Keep sounds short and at moderate volume. Test them on your classroom speakers before game day.
Step 6: Create Your Victory Slide
Your final slide is where students celebrate their success, so make it memorable! Include a congratulatory message like “You escaped!” with fun visuals, confetti animations, a trophy image, or celebratory emojis work great. Add their completion time if you’re tracking it, or list team names who finished. Consider inserting a sound effect (applause or cheers) that plays automatically when the slide loads. This positive reinforcement makes students eager to try your next escape room game.
Testing and Launching Your Escape Room Game
Running a Test Playthrough
Before your students dive in, run through the entire game yourself as if you’re a player. Click every answer choice, both correct and wrong ones, to confirm they lead where they’re supposed to. Make sure hyperlinks don’t dead-end on blank slides or loop back incorrectly. Test any timers, animations, or sound effects to verify they work on your classroom computer, not just your laptop. Check that hint slides are accessible when needed and that the victory screen appears after solving the final puzzle. Try deliberately making mistakes to see if your feedback system guides students back on track. This ten-minute walkthrough catches broken links, confusing navigation, and technical hiccups before they derail your lesson.
Introducing the Game to Your Class
Start by projecting the opening slide and building excitement, tell students they’re about to become puzzle solvers on a mission. Clearly explain the goal (escape the room by solving all challenges), how navigation works (clicking answers moves them forward or backward), and what happens when they get stuck (hint slides are there to help).
Divide students into small teams of three or four, assigning roles like navigator, recorder, or clue-keeper to ensure everyone participates. Set a visible timer, 15 to 25 minutes works well for most games, and establish a signal for when time runs out. Remind teams that collaboration beats speed, and wrong answers teach as much as correct ones. Walk around during gameplay to offer gentle nudges without giving away solutions, and celebrate the first team to escape while acknowledging all teams’ progress.
Popular Escape Room Game Mechanics for Classrooms
Once you’ve built your first escape room game, you’ll want to vary the puzzles to keep students engaged across multiple sessions. Here are the most effective mechanics that translate beautifully into PowerPoint format.
Lock and Key puzzles are the simplest starting point. Students answer a question to “unlock” the next slide. For example, solve a math problem and the answer becomes the code they click to advance. Create buttons labeled with different numbers, only the correct answer hyperlinks to the next challenge.
Pattern Recognition challenges work wonderfully for visual learners. Show a sequence of images, colors, or shapes with one missing element. Students identify what comes next to proceed. This mechanic shines in science classes when reviewing cycles, processes, or classification systems.
Cipher and Code Breaking activities add mystery without requiring advanced PowerPoint skills. Present a simple substitution cipher (A=1, B=2) alongside an encoded message. Students decode the clue to discover which door to click. You can theme these around historical events, vocabulary words, or chemical symbols.
Scavenger Hunt mechanics send students clicking through multiple slides to collect pieces of information. Each puzzle reveals one word or number, and students must combine all the pieces to create the final escape code. This approach reinforces content review across different topics in a single game.
Sequencing Puzzles require students to arrange steps in the correct order, perfect for reviewing historical timelines, scientific methods, or story elements. Display scrambled steps as clickable buttons. Only the correct sequence path leads to the victory slide, while wrong choices loop back with hints.
When planning your 4 team schedule consider assigning different mechanics to each round so teams rotate through varied challenge types. Mix two or three mechanics in each game to maintain momentum and accommodate different learning styles.
Frequently Asked Questions
Teachers regularly ask practical questions when they first consider building a PowerPoint escape room. These quick answers will help you plan and execute your game confidently.
How long does it take to build a PowerPoint escape room game?
Your first game typically takes 2-4 hours to build, depending on complexity and the number of puzzles you include. Once you’ve created one, subsequent games go much faster because you can reuse your structure and navigation setup.
What’s the ideal team size for classroom escape rooms?
Groups of 3-4 students work best, giving everyone a chance to contribute without creating chaos. For a class of 24 students, you’d run 6 teams simultaneously, either competing against each other or working at their own pace.
Can I adapt escape rooms for any subject?
Absolutely. Math, science, language arts, social studies, and even art or music all work beautifully because you’re just wrapping your review content in puzzle formats. The mechanics stay the same while the questions change.
Do templates really save time?
Yes, starting with a pre-built template cuts your initial creation time in half because the navigation and basic structure are already done. You just swap in your own questions, adjust the theme, and customize the visuals to match your classroom needs.
Most teachers worry about difficulty balance. Start easier than you think necessary because students need time to understand how the game works before tackling harder puzzles. You can always increase difficulty in future versions once your class knows the format.
Reusability is one of the biggest advantages. Change the questions and you’ve got a fresh game for a different unit or even a different class. Many teachers keep a library of escape room templates they rotate throughout the year, updating content as curriculum changes. The time investment in your first game pays off repeatedly.
You don’t need to build a masterpiece on your first try. Start with three or four simple puzzles, a fun theme your students will enjoy, and clear instructions. The beauty of PowerPoint escape rooms is that once you’ve created the basic structure, you can reuse it all year long by swapping out questions and tweaking the story. Your students will be so engaged that they won’t even realize they’re reviewing.
Every escape room you design becomes uniquely yours. Add inside jokes from your classroom, reference topics you’ve covered, or tie the theme to current units. The customization is what makes these games special and memorable for your students. They’ll ask to play again, and you’ll have a reliable tool that transforms review days from groans into genuine excitement. Give it a shot, your first escape room is just a few slides away.