
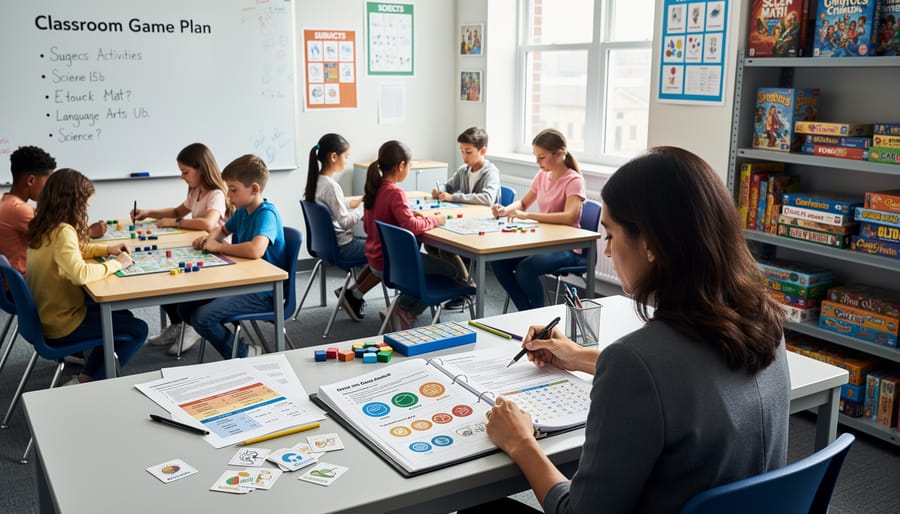
Why Every Classroom Game Needs a Design Document (And How to Create One Fast)
Download a free PDF template specifically designed for classroom games to start organizing your game ideas in one accessible format. A well-structured template saves hours of planning time and ensures you capture every essential detail—from learning objectives and materials needed to gameplay mechanics and assessment methods.
Transform your scattered game notes into professional game design documents that you can share with colleagues, substitute teachers, or use year after year. The right PDF template acts as your personal game library, making it simple to duplicate successful games and adapt them for different subjects, grade levels, or student needs without starting from scratch each time.
Build a localization-ready catalog by including customizable sections in your template for vocabulary adjustments, cultural adaptations, and difficulty modifications. This approach lets you take one stellar game design and quickly modify it for ESL learners, advanced students, or different content areas while maintaining the core mechanics that make it effective.
Choose templates that include visual sections for sketching game boards or card layouts, clear spaces for rules and variations, and dedicated areas for reflection notes about what worked well. The PDF format means you can fill it out digitally, print copies for your planning binder, or share with your teaching team effortlessly. Your future self will thank you when you can pull up last year’s successful review game and have everything you need to recreate the magic in minutes rather than hours.
What Makes a Game Design Document Essential for Classroom Games
Think of a game design document as your recipe card for classroom fun! Just like you wouldn’t want to reinvent your favorite lesson plan from scratch each time, a GDD template saves you precious time and energy when creating review games.
Here’s why this simple tool becomes your best teaching companion: consistency across your classroom activities means students know what to expect, making transitions smoother and participation higher. When you use the same template structure for your math review game and your vocabulary challenge, you’re building familiarity that helps kids focus on learning rather than figuring out new rules every time.
The beauty really shines when you think about reusability. Design a quiz show game for 5th grade science? That same template works brilliantly for 3rd grade social studies with just a content swap. You’re not starting from zero—you’re customizing a proven winner. This makes adapting games across different subjects and grade levels incredibly efficient.
Collaboration becomes effortless too. When you share your GDD template with fellow teachers, they immediately understand your game’s structure, objectives, and materials needed. No lengthy explanations required! Your colleague can grab your template, plug in their own content, and launch a fantastic review session the very next day.
Plus, having everything documented means you’re building your personal game library. Next year when you need that fraction review game? It’s ready to go. Want to modify it slightly? All your notes are right there. You’ll wonder how you ever managed without this organized approach to classroom gaming. The initial time investment pays dividends throughout your entire teaching career.
The Core Elements Your Classroom Game Design Document Should Include
Game Objective and Learning Goals
This is where you get to the heart of your game! Start by asking yourself: what specific skills or knowledge do I want my students to walk away with? Think beyond just subject matter—maybe you’re targeting critical thinking, teamwork, or problem-solving alongside math facts or vocabulary building.
Write these goals in clear, simple language. For example: “Students will identify equivalent fractions” or “Students will practice Spanish verb conjugations in past tense.” Keep it focused—one to three main learning objectives works best.
Next, define what success looks like. How will students win or complete the game? Make sure this connects directly to your learning goals. If you want students practicing multiplication, winning should require demonstrating that skill through engaging game questions or challenges.
Document both the educational outcome and the fun factor. Yes, fun counts! Note what will keep students motivated—earning points, unlocking levels, or collaborative achievements. When you’re clear on objectives upfront, you can customize and adapt your game template for different subjects and grade levels later.
Game Mechanics and Rules
This is where your game truly comes to life! Think of this section as your game’s instruction manual—clear enough that any substitute teacher could run it smoothly.
Start by explaining the basic flow: How does the game begin? What happens during each round? Document your turn order so students know exactly when they participate. This prevents chaos and keeps everyone engaged!
Next, outline your scoring systems. Will students earn points for correct answers? Bonus points for teamwork? Write it all down! Clear scoring rules make games fair and motivating.
Don’t forget your student participation structure. How will you ensure everyone gets involved? Document strategies like rotating roles, small group formations, or individual response methods.
Include win conditions too—what does success look like? The beauty here is customization. Adjust rules for different grade levels or learning objectives, and your template becomes endlessly adaptable across subjects and student needs!

Customization Notes and Variables
Here’s where the magic happens! When creating your game design document template, think of it as a flexible framework that grows with you. Include a dedicated section for tracking customizable elements—this becomes your quick-reference guide for adapting games across your curriculum.
Start by noting which topics or themes can swap in and out. A vocabulary-building card game designed for science terms works beautifully for history vocabulary too! Document difficulty levels clearly: beginner, intermediate, and advanced versions keep the same game fresh for different grade levels or abilities.
Team size variations matter more than you might think. Mark whether your game works for pairs, small groups of four, or whole-class play. This flexibility means you can use the same core game structure whether you have 15 students or 30.
Create a simple variables checklist in your template: subject adaptability, complexity adjustments, time modifications, and material alternatives. When you document these options upfront, future-you will thank present-you! You’ll spend less time reinventing the wheel and more time engaging your students. Plus, sharing your template with fellow teachers becomes effortless when everything’s clearly marked and ready to customize.
Localization and Adaptation Features
Your game design document template becomes even more powerful when it welcomes every student into the experience! Think of localization and adaptation features as your classroom’s universal welcome mat.
Start by adding a simple language section to your template. Include fields for vocabulary lists in different languages, especially if you have multilingual learners. This makes it super easy to swap out game terms and instructions without redesigning everything from scratch.
Cultural considerations matter too! Build in a customization area where you can note any cultural references, holidays, or examples that might need adjusting for different student backgrounds. For instance, a holiday-themed math game can quickly transform to celebrate various cultural celebrations throughout the year.
Don’t forget accessibility modifications! Your template should have dedicated spaces for noting alternate formats like larger text options, audio cues, or simplified rule variations. These adaptations ensure every student can participate fully, regardless of learning differences or physical needs.
The beauty of planning for these features upfront means your amazing game ideas become instantly reusable and shareable. You’re not just creating one game but building a flexible foundation that grows with your diverse classroom needs. Plus, when you document these adaptations clearly, other teachers can easily implement your games in their unique settings too!
How Localization-Ready Templates Save You Preparation Time
Imagine this: You’ve created an amazing vocabulary game that your students absolutely love! Now you want to use it with your Spanish class, adapt it for younger learners, or share it with a colleague who teaches ESL students. Without proper documentation, you’d essentially be rebuilding the game from scratch each time. That’s where localization-ready templates become your best friend.
A localization-ready template simply means your game design document is organized in a way that makes adaptation easy and fast. Think of it as having all your ingredients clearly labeled and measured before you start cooking—you can quickly swap ingredients or adjust portions without confusion.
Here’s what makes a template truly localization-ready. First, it separates content from mechanics. Your game rules and structure stay in one section, while all the text, questions, and cultural references sit in another. This means you can translate or modify the content without touching the core gameplay. Second, it includes placeholder sections specifically for language variations, cultural adaptations, and age-appropriate modifications. You’re not reinventing the wheel—you’re simply filling in new blanks.
The time-saving benefits are fantastic. Instead of spending hours recreating a game for different contexts, you’ll invest maybe 20-30 minutes updating the relevant sections. Need the same math game in French? Swap out the language content. Want to adjust difficulty for third graders instead of fifth graders? Modify just the content complexity section. Planning to use it during cultural heritage month? Update the thematic elements while keeping the winning gameplay intact.
Even better, these templates help you build a personal library of adaptable games. Each documented game becomes a flexible resource you can pull out whenever needed, customize quickly, and deploy with confidence. You’re creating smart, reusable teaching tools that grow more valuable over time, freeing you up to focus on what really matters—engaging with your students.
Creating Your Own Simple Game Design Document in PDF Format
Starting with a Template Structure
Great news! You don’t need to start from scratch. A solid template structure makes documenting your classroom games quick and painless. Think of it as your game’s blueprint that anyone can follow.
Start with these essential sections in your PDF template:
Game Overview: Include the game title, subject area, grade level, and a brief one-paragraph description. This helps you quickly identify which game fits your lesson plan.
Learning Objectives: List 2-4 specific skills or concepts students will practice. Keep it clear and measurable.
Materials Needed: Everything from markers to tablets. This saves you precious prep time later.
Setup Instructions: Step-by-step directions for preparing the game space and materials.
Game Rules and Gameplay: Break down how students play, turn order, win conditions, and time limits. Use simple bullet points.
Adaptations and Variations: Here’s where the magic happens! Note different difficulty levels, language options, and subject swaps. This section makes your game reusable across different classrooms and situations.
Assessment Notes: Quick ways to gauge student understanding during gameplay.
Keep each section short and scannable. Remember, you’re creating a tool that future-you will thank present-you for making clear and customizable. Your template should feel like a helpful guide, not homework.
Filling in the Details That Matter
Let’s focus on capturing the essentials without creating extra work for yourself! When documenting your classroom game, think quality over quantity. Start with the absolute must-haves: your game’s main objective (what learning goal does it support?), basic rules (keep these simple and numbered), and materials needed (so you can grab everything quickly next time).
Here’s what to definitely include: the target grade level, subject area, and estimated playing time. These details make your game catalog incredibly useful when you’re planning future lessons or sharing with colleagues. Add a quick troubleshooting section too—jot down common student questions or sticky moments you encountered. Trust us, your future self will thank you!
Now for the freedom part: skip lengthy backstories about game development unless they’re genuinely helpful. You don’t need elaborate diagrams for simple activities, and extensive playtesting notes can be summarized in a few bullet points. If a game uses standard classroom supplies like dice or cards, a simple list works perfectly—no need for detailed descriptions.
Think of your template as a helpful recipe card, not a research paper. Capture enough information that another teacher (or you, six months later!) could run the game successfully without confusion. The sweet spot is creating documentation that saves time rather than consuming it, making your game design efforts sustainable and shareable across your teaching journey.
Using Your Game Design Document to Build a Template Catalog
Once you’ve created a few game design documents, here’s where the magic really happens: building your own game template catalog! Think of this as your personal library of ready-to-go classroom games that you can pull out whenever you need them.
Start by creating a simple folder system on your computer or cloud storage. Organize your game design document PDFs by subject, grade level, or learning objective. For example, you might have folders like “Math Games Grade 3-5” or “Vocabulary Builders.” This makes finding the perfect game super quick when planning lessons.
The real beauty of maintaining this catalog is sharing with colleagues. Your fellow teachers can adapt your game templates for their own classes, saving everyone precious time. Plus, when you revisit a game from last year, your design document reminds you exactly how it worked, what materials you needed, and even those helpful notes about what to tweak next time.
Consider adding a master index document that lists all your games with quick descriptions and key details. This becomes your at-a-glance reference guide. You can even rate games based on student engagement or note which ones work best for different learning styles.
Remember to update your documents as you refine games throughout the year. Those little improvements add up, and future you will be so grateful for the notes. Your catalog becomes a living resource that grows more valuable with each school year, creating a sustainable system that makes game-based learning easier and more consistent across your teaching practice.

Here’s the truth: game design documents don’t need to be intimidating or complicated. They’re simply planning tools that help you think through your classroom games before you introduce them to your students. Think of them as recipe cards for learning activities—straightforward references that make your teaching life easier.
When you take a few minutes to document your game ideas, you’re setting yourself up for success in multiple ways. You’ll spend less time reinventing the wheel each semester, you can easily share winning activities with colleagues, and you’ll have a ready-made catalog of games you can adapt for different subjects or grade levels. Plus, when that substitute teacher steps in, they’ll actually understand how to run your favorite review game.
Start simple. Don’t feel pressured to create elaborate, multi-page documents right away. Begin with one game you already love teaching and jot down the basics: objective, materials, rules, and how students win. Use a simple template, save it as a PDF, and build from there. As you create more, you’ll naturally develop your own style and discover which details matter most for your teaching context.
Remember, customization is your friend. Your game design documents should work for you, not the other way around. Add sections that make sense for your classroom, skip what doesn’t, and watch your personal library of effective learning games grow over time.