Print Your Own Classroom Games in Minutes (No Fancy Equipment Required)
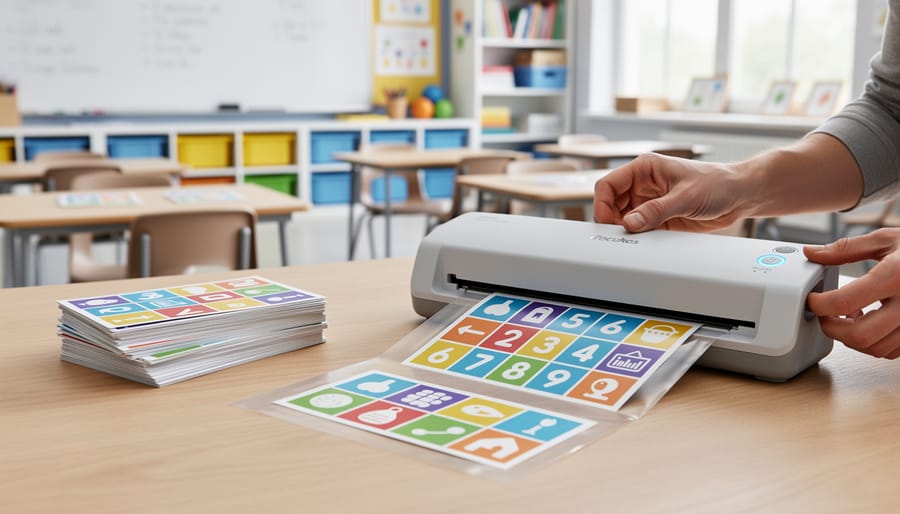
Print your game components on cardstock rather than regular paper to create materials that withstand hundreds of classroom uses. Laminate cards, game boards, and spinner pieces using self-adhesive laminating sheets or a thermal laminator—this simple step transforms fragile printouts into durable tools that last entire school years. Store printed game pieces in labeled ziplock bags or small containers to keep everything organized and ready for quick classroom deployment.
Choose games with components you can easily customize for different skill levels or learning objectives. Replace generic questions with vocabulary words your students are currently studying, adjust difficulty levels by swapping number ranges on dice templates, or modify game boards to reflect current classroom themes. Most printable games allow you to edit text fields before printing, giving you complete control over the learning content.
Consider printing multiple copies of popular games to accommodate small group rotations or learning centers. Color-code different game sets using colored paper or markers to prevent pieces from different games mixing together. Print answer keys on separate sheets and keep them accessible for student self-checking or peer review, promoting independent learning while reducing your grading time.
Transform single-purpose games into reusable templates by laminating blank versions and using dry-erase markers for changing content weekly. This approach maximizes your printing budget while keeping learning materials fresh and relevant throughout the year.
What Makes a Game Component ‘Print-and-Play’?
Think of print-and-play games as your classroom’s best-kept secret for engaging learning activities! These are simply game materials designed to be downloaded and printed on regular paper, then used right away in your lessons. No fancy equipment needed, no complicated assembly required.
Here’s what makes these components so wonderfully teacher-friendly: You find a game template online, hit print, and within minutes you have a ready-to-use educational tool. We’re talking about game boards, playing cards, spinner wheels, dice templates, tokens, and instruction sheets that come straight from your classroom printer.
The beauty of print-and-play is its simplicity. Unlike traditional board games that require manufacturing or expensive purchases, these materials need just basic supplies you already have: paper, a printer, scissors, and maybe some glue or tape. Some components work perfectly as-is on regular printer paper, while others benefit from a quick lamination for durability.
What really sets print-and-play apart is its accessibility. You can print exactly what you need, when you need it. Teaching fractions tomorrow and want a matching game? Print it tonight. Need extra copies because your class size grew? Print more. Want to customize the content to match your current unit? You can do that too!
This approach saves you precious time and budget while giving you endless possibilities for interactive learning experiences that keep students engaged and excited about classroom activities.
Essential Game Components You Can Print Today
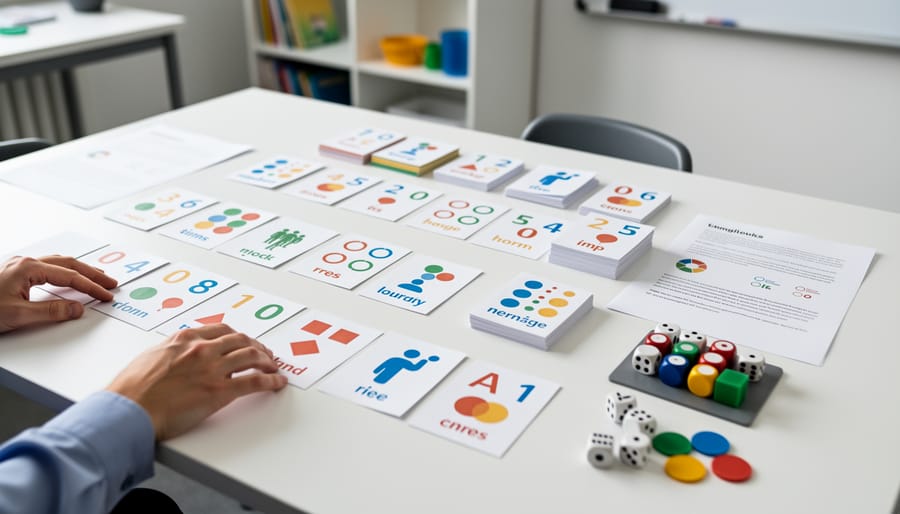
Game Cards and Playing Decks
Game cards are classroom superstars! Transform basic printables into engaging flashcards, review question cards, character cards for storytelling, or even full playing card decks for math and literacy games. The possibilities match your creativity!
Your paper choice makes a real difference in durability. Cardstock (65-110 lb weight) creates sturdy, long-lasting cards that withstand enthusiastic handling and frequent use. Regular paper works perfectly for short-term activities or one-time games, saving your budget for materials you’ll reuse repeatedly. Many teachers laminate regular paper cards to get cardstock-like durability without the extra cost.
Pro tip: Print multiple card sets on one page, then cut them apart. This saves time and paper while giving you backup sets when cards inevitably go missing. Color-code different card types or difficulty levels to help students self-select appropriate challenges.
Consider creating printable escape room components using card formats too. Students love collecting clue cards as they solve puzzles! Store finished card sets in labeled envelopes or small boxes so they’re ready whenever you need a quick learning activity.
Game Boards and Playing Surfaces
Game boards offer endless possibilities for classroom fun! Simple track games work wonderfully for younger students—think linear paths where players move from start to finish, perfect for practicing counting or basic facts. Grid-based boards open up strategic gameplay for older learners, ideal for review games or vocabulary practice. You can even use our free blank board template to design custom layouts that match your current unit!
For durability, lamination is your best friend. Those printed boards will withstand enthusiastic gameplay, sticky fingers, and repeated use throughout the school year. If you don’t have access to a laminator, clear contact paper works great too! Another budget-friendly trick is slipping your printed board into a page protector—students can even use dry-erase markers directly on the surface for added interactivity. Consider printing boards on cardstock before laminating for extra sturdiness, especially for games that get pulled out weekly.
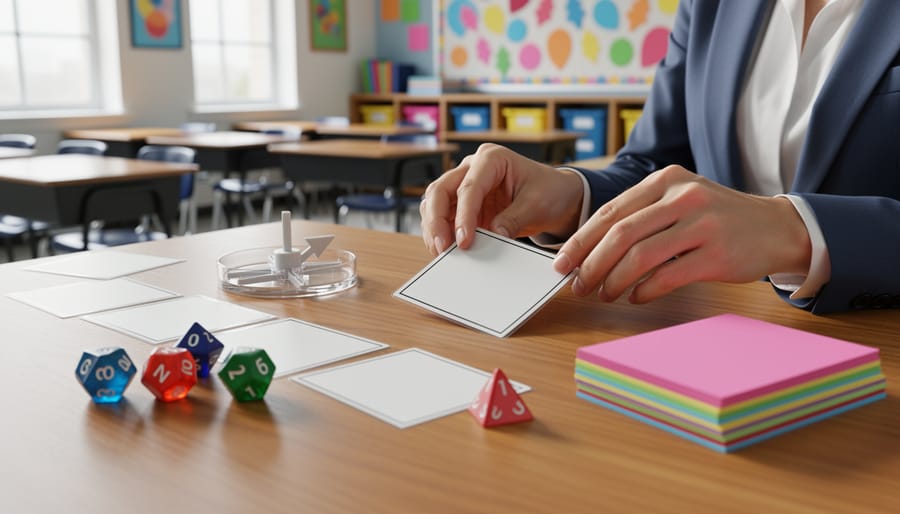
Tokens, Markers, and Game Pieces
Print player tokens, scorekeeping markers, and reward chips to bring your classroom games to life! Simple cardboard circles, character cutouts, or themed shapes work wonderfully as game pieces. Pair them with a randomizer wheel for even more engagement.
For easy assembly, print tokens on cardstock for extra durability. Laminate them if you plan to reuse them throughout the year. You can also glue printed pieces to wooden discs or buttons for a sturdier feel. Color-coding different token sets helps students quickly identify their game pieces during play.
Create reward chips featuring positive messages, points, or stickers to motivate learners. Customize tokens with student names, subject themes, or seasonal designs to match your lesson plans. Keep assembled pieces in labeled bags or small containers for quick classroom setup. These printable markers transform ordinary games into memorable learning experiences!
Scorecards and Tracking Sheets
Scoreboards and tracking sheets transform simple games into exciting competitions your students will love! Print reusable point trackers where teams can mark their progress with dry-erase markers or counters. Design simple tables with team names and score columns, or create visual progress trackers with spaces students can color in as they advance. Want something more interactive? Try ladder-style trackers where teams climb toward a goal, or thermometer charts that fill up with achievements.
These printables work beautifully for both short activities and week-long classroom challenges. Laminate them for durability, and you’ve got tools you can use all year! Customize point values to match your lesson objectives, add motivational graphics that fit your theme, or include bonus challenge boxes for extra engagement. The best part? Students can help design their own tracking systems, giving them ownership of their learning journey while you manage classroom dynamics with ease.
Making Your Printed Components Classroom-Ready
Quick Assembly Tips That Actually Work
Let’s make assembly time a breeze so you can get straight to the fun! Start by investing in a good paper cutter – it’s a game-changer compared to scissors and saves tons of time when cutting multiple cards or game boards. Create an assembly station with clear containers or ziplock bags labeled by game component. This keeps pieces organized and makes cleanup super easy.
Here’s a pro tip: laminate before cutting when possible. It takes a few extra seconds but prevents those pesky corners from peeling later. For game cards, cut them slightly smaller than the lamination edge to seal everything in perfectly.
Get students involved in the assembly process! Older students can help laminate and cut components during indoor recess or free time. They love being helpers, and it builds ownership of classroom materials. Use a rotation system so everyone gets a turn.
Keep a “game repair kit” handy with extra laminating pouches, cardstock, and clear tape. When pieces inevitably wear out, you’ll be ready for quick fixes instead of reprinting entire games. Color-code different games with sticky dots or colored paper backing – you’ll thank yourself when sorting mixed-up pieces later!
Durability Hacks on a Teacher Budget
You don’t need expensive laminating equipment to make your printed games last! Here are some budget-friendly tricks that really work. Contact paper is your best friend – it’s available at dollar stores and works just like lamination. Simply sandwich your printed game between two sheets, smooth out the bubbles, and trim the edges.
For card games, print directly on 110lb cardstock instead of regular paper. It’s sturdier and holds up to repeated shuffling and handling. You can find affordable packs at office supply stores, especially during back-to-school sales.
Storage makes a huge difference too! Use zipper-top bags to organize game pieces by set, and store them in labeled shoe boxes or plastic bins. This prevents bent corners and lost components.
Here’s a quick tip: reinforce high-traffic game pieces with clear packing tape along the edges before students handle them. It takes just minutes but adds weeks to their lifespan.
For game boards, consider mounting them on cardboard from cereal boxes before covering with contact paper. This double-layer approach creates a professional feel without the professional price tag. Your printed games will survive countless rounds of enthusiastic learning!
Customizing Print-and-Play Games for Your Classroom
Adapting Components for Different Grade Levels
One of the best things about printable games is how easily you can tailor them to your students! For younger learners, bump up the font size to at least 18-24 points and choose simple, sans-serif fonts. Include plenty of colorful images and visual cues that help non-readers navigate the game independently.
For older elementary students, you can introduce more detailed instructions and reduce font sizes to 14-16 points. Add slightly more complex game mechanics and vocabulary that challenges without overwhelming.
Middle and high schoolers can handle smaller text, intricate rules, and sophisticated content. Consider adding critical thinking elements or strategy components that engage older minds.
The beauty of making games accessible is that you can create multiple versions of the same game concept. Save your original template and quickly modify it for different grade levels, creating a game library that grows with your students!
Tailoring Games to Your Curriculum
The real magic happens when you customize generic game templates to match exactly what your students are learning. Think of a simple board game template as your blank canvas – you can transform it into a math facts race, vocabulary builder, or history timeline challenge in minutes!
Start with a basic game structure like bingo, matching cards, or spinner games. Then, simply swap out the generic content with your lesson material. Teaching multiplication? Add math problems to bingo squares. Covering Spanish vocabulary? Create matching pairs with English-Spanish word cards. Reviewing the American Revolution? Fill game spaces with key events and dates.
The beauty of this approach is that you create the game once and reuse it throughout the year with different content. Save your blank templates digitally, and you’ll have a go-to resource whenever you need quick review activities. Your students get the engagement boost of gameplay while reinforcing the specific concepts they need to master. Plus, they often don’t even realize how much they’re learning because they’re having too much fun!
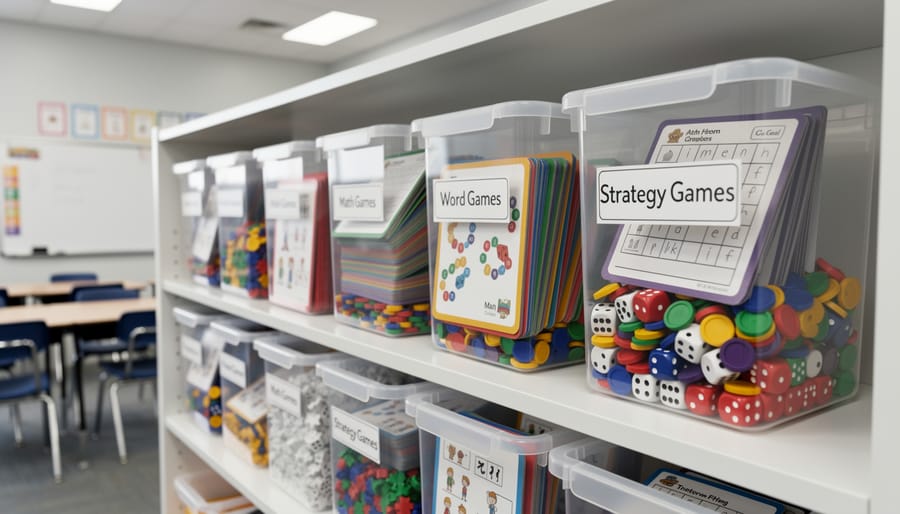
Storage and Organization Solutions
Let’s be honest—printed game pieces can quickly turn into classroom chaos if you don’t have a storage plan! The good news? Keeping everything organized doesn’t require fancy supplies or a big budget.
Start with simple solutions you probably already have. Ziplock bags are your best friend for storing card sets, game pieces, and dice together. Label each bag with the game name and grade level using a permanent marker. Store multiple games in a plastic shoe box or small desktop organizer for easy access.
For game boards, invest in a few inexpensive file folders or magazine holders. Roll up larger boards and secure them with rubber bands, or store flat boards between cardboard sheets to prevent bending. Keep instruction sheets attached to each game using a paper clip or small binder clip.
Create a simple checkout system so students can help with cleanup. Use a laminated visual checklist showing what pieces belong in each game—this makes it easy for kids to verify everything’s there before putting it away.
Consider dedicating one shelf or bin in your classroom specifically for print-and-play games. When everything has a designated spot, you’ll spend less time searching and more time playing. Your future self will thank you when game time rolls around and everything’s ready to go!
You now have everything you need to transform your classroom into an exciting game-based learning environment! Start small—pick just one simple game that matches your current lesson plans. Print it, try it with your students, and watch their engagement soar. As you gain confidence, gradually expand your collection of print-and-play games. Remember, every game you introduce is an opportunity to make learning memorable and fun. Your students won’t just retain information better—they’ll actually look forward to reviewing concepts! The best part? You’re building a reusable toolkit that saves time and budget while delivering incredible educational value. So grab that first template, hit print, and get ready to see the magic of game-based learning unfold in your classroom. Your students are waiting for the adventure!