How to Run Your Classroom Games on Any Device Your Students Bring
Run your favorite classroom games seamlessly across Chromebooks, iPads, and laptops by choosing web-based platforms that work in any browser without downloads. Test your game on at least two different device types before class starts—what displays perfectly on your desktop might look cramped on a student’s tablet, and catching these issues early prevents mid-lesson scrambles.
Create a simple device compatibility checklist for students and families that includes minimum browser requirements, internet speed recommendations, and a backup plan for older devices. Share a quick 30-second test link during your first session so students can verify their setup works before diving into actual game content.
Keep a running document of device-specific quirks you discover—like certain features working differently on Safari versus Chrome—and share these tips with your students upfront. This proactive approach transforms potential tech frustrations into smooth, engaging experiences where every student can participate fully, regardless of what device they’re using. When your games work everywhere, you spend less time troubleshooting and more time celebrating those exciting learning moments that make interactive activities so powerful.
What Cross-Platform Really Means for Your Classroom
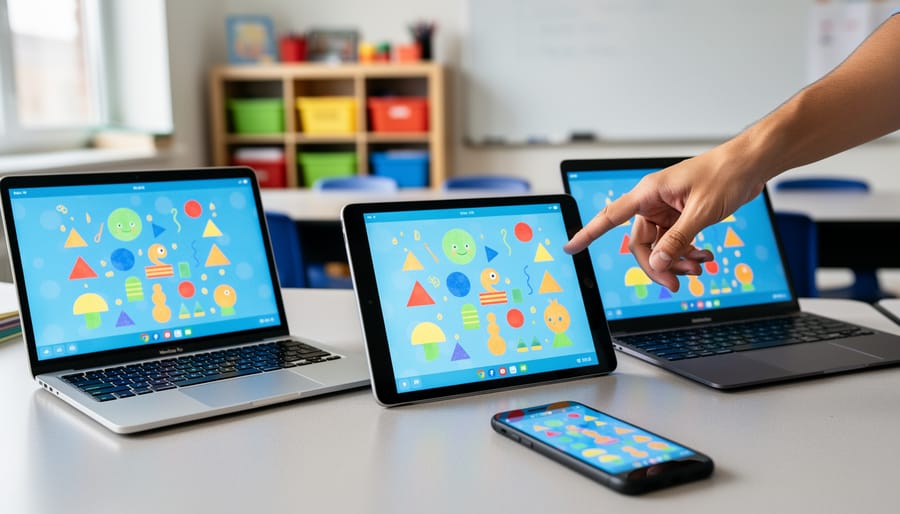
Imagine hosting a review game where some students join from their iPads, others from Chromebooks, and a few from their phones at home—and everyone plays together seamlessly. That’s the magic of cross-platform software, and it’s simpler than you might think!
Cross-platform simply means the game works on different types of devices without special downloads or complicated setup. Instead of worrying whether your students have the “right” kind of computer or tablet, you can focus on what matters: creating an engaging learning experience that gets everyone involved.
Here’s what makes it perfect for your classroom: When you launch a review game, students just need to open their web browser and type in a game code. No apps to install, no permission slips for downloads, and no tech headaches. Whether a student is using an old laptop, a brand-new tablet, or even their parent’s smartphone, they’re all playing the same game at the same time.
This flexibility is especially valuable during hybrid learning or when students have different devices at home. You’re not excluding anyone because they don’t have a specific device—you’re including everyone with whatever technology they already have. It’s like having one universal remote that works with every TV, making your job easier and your games more accessible to all learners.
Why Device Compatibility Matters for Remote Review Games
The Mixed-Device Classroom Reality
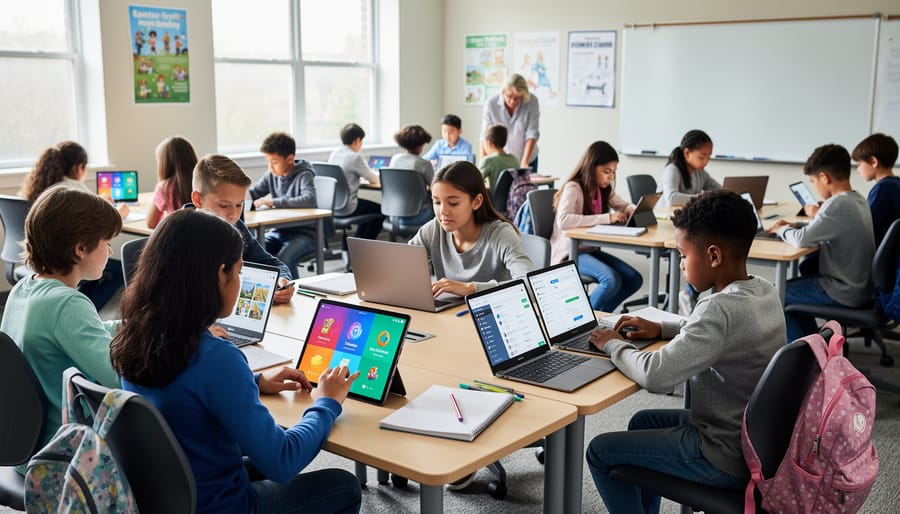
Picture your classroom right now: some students are on iPads, others have Chromebooks, a few are using personal laptops, and several are joining from phones at home. Sound familiar? This mixed-device reality has become the norm in today’s learning environments, and it’s exactly why cross-platform compatibility matters so much.
Whether you’re teaching in person, running a hybrid class, or managing fully remote learning, you can’t predict or control what devices your students will use. That third-grader might be borrowing mom’s iPhone, while the high schooler logs in from a Windows laptop. The good news? When your interactive games and activities work seamlessly across all these devices, you can focus on what really matters: engaging every student in meaningful learning experiences. No more worrying about who can participate or scrambling to find alternatives for students with different devices. Everyone’s included, everyone’s learning, and you’re free to bring your creative lesson plans to life.
Keeping Every Student Engaged
Cross-platform software is your secret weapon for making sure every single student can participate, regardless of what device they’re using. Whether your students are joining from Chromebooks, iPads, old laptops, or their phones, compatible games mean nobody sits on the sidelines because of their tech. This is especially important in classrooms where device variety is the reality, not the exception.
Think about it: when you choose games that work seamlessly across different platforms, you’re creating an inclusive learning environment where students focus on learning, not troubleshooting. You won’t have students frantically messaging that they can’t access the activity while others are already playing. Plus, cross-platform tools help you manage challenges beyond device differences, like internet connectivity issues that might affect some students more than others.
The best part? You can customize activities knowing they’ll display properly for everyone, keeping your entire class engaged and motivated together.
Setting Up Your PowerPoint Games for Any Device
Cloud Storage Solutions That Work Everywhere
Storing and sharing your game files just got easier with these fantastic cloud storage options! Google Drive, OneDrive, and Dropbox are your best friends when it comes to distributing classroom games to students using different devices.
Google Drive integrates beautifully with Google Classroom, making it perfect if your school already uses Google Workspace. Simply upload your game files to a folder, adjust sharing settings to “Anyone with the link can view,” and share away! Students can access games from Chromebooks, tablets, or any device with a web browser.
OneDrive works seamlessly if your district uses Microsoft tools. It’s built right into Windows computers and offers generous storage space for your educational materials. The collaboration features let you update games instantly, and all students see the changes automatically.
Dropbox is wonderfully straightforward and works everywhere. Create a dedicated folder for your classroom games, generate a shared link, and students can download files regardless of their device type. The free version offers plenty of space for most classroom needs.
All three options keep your games accessible 24/7, which means students can review activities at home or catch up on missed lessons. This flexibility transforms how you deliver engaging content across your diverse classroom technology landscape.
PowerPoint vs. Google Slides: Making the Right Choice
When choosing between PowerPoint and Google Slides for your classroom games, think about what devices your students are using. Google Slides wins for flexibility since students can join from any device with just a browser – Chromebooks, tablets, phones, or laptops. No downloads needed, which is perfect when you have a mix of devices in your classroom!
PowerPoint works great if everyone’s on Windows computers or has the Microsoft 365 app installed. The animations tend to be smoother, and you’ll have more design options for creating eye-catching game boards. However, sharing can get tricky with students on different platforms.
Here’s a practical tip: If you create your game in PowerPoint, save a copy in Google Slides format too. Simply upload your PowerPoint file to Google Drive and open it with Google Slides. You might need to adjust some formatting or animations, but it gives you both options ready to go.
For maximum compatibility, stick with Google Slides from the start. It autosaves your work, makes sharing with students incredibly easy through a simple link, and everyone can participate simultaneously. Plus, you can access your games from any device, giving you the freedom to teach from anywhere in your classroom or building!
Screen Sharing for Live Remote Play
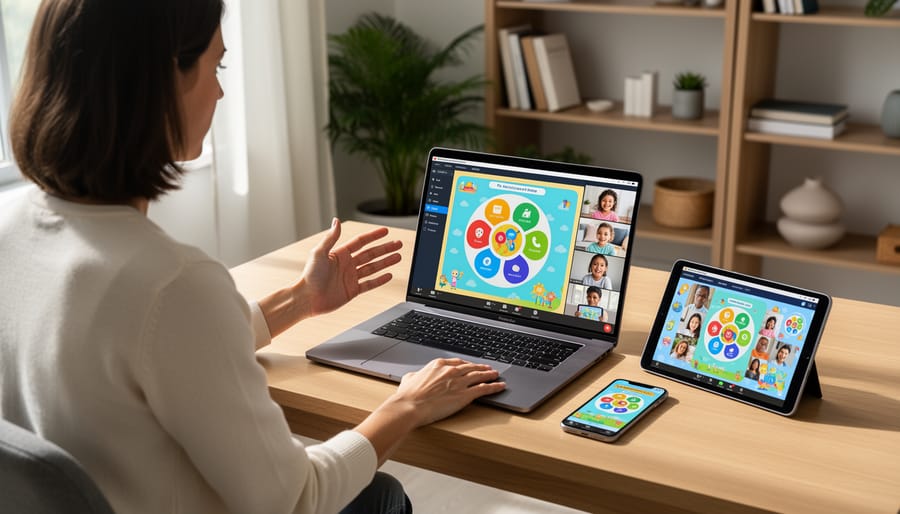
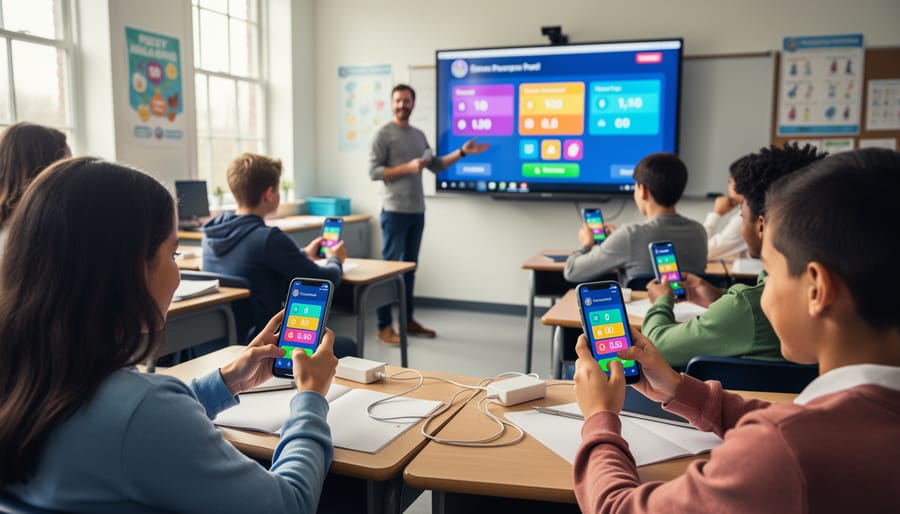
Screen sharing transforms video conferencing platforms into instant game show studios! With Zoom, Google Meet, or Microsoft Teams, you can share your screen to display quiz games, interactive presentations, or digital game boards while students participate from any device they have available.
Here’s how it works: Open your chosen game on your computer, then click the screen share button in your video platform. Select the window displaying your game, and voilà—everyone sees the same content simultaneously! You control the game flow while students shout answers, type in the chat, or use reaction buttons to participate. This approach completely eliminates the device compatibility headache since students only need to see your screen, not run the software themselves.
For the smoothest experience, close unnecessary browser tabs and applications before sharing to avoid connectivity challenges. Enable audio sharing if your game includes sound effects or music—look for the checkbox that says “Share computer sound” when selecting your screen.
The beauty of this method is its flexibility. Run PowerPoint games, browser-based activities, or dedicated game software—whatever works best for your lesson. Students stay engaged by participating vocally or through chat, creating an inclusive experience regardless of what device they’re using at home or in class.
Troubleshooting Common Cross-Platform Challenges
When Animations or Sounds Don’t Work
Nothing’s more frustrating than launching an exciting game only to have the sounds cut out or animations freeze! The good news? These hiccups usually have simple fixes.
First, check that your browser is up to date. Older versions sometimes struggle with newer media features. A quick browser update often solves the problem instantly.
Next, try refreshing the page or clearing your browser cache. Think of it as giving your browser a fresh start! Sometimes temporary files get jumbled and just need a reset.
If certain students still can’t hear sounds, double-check their device volume and make sure they’re not in silent mode. It sounds obvious, but it’s the most common culprit! Also verify that the browser has permission to play audio.
For animation issues, test if hardware acceleration is causing conflicts. You can usually toggle this in your browser settings under advanced options.
Still stuck? Try switching to a different browser. Chrome, Firefox, and Edge handle media differently, so what doesn’t work in one might work perfectly in another. Keep a backup browser option handy for quick transitions during class time.
File Format Problems Made Simple
Good news—you don’t need to be a tech whiz to handle file formats! When sharing interactive games across different devices, think of file formats as different languages your presentations speak. The .pptx format works beautifully on computers with PowerPoint or Google Slides, making it perfect for downloadable games you can customize. PDF files are your reliable backup since they open on virtually any device, though they’re less interactive. Here’s the exciting part: online presentation tools give you the most flexibility! They work seamlessly whether students are on Chromebooks, tablets, or phones. For the smoothest classroom experience, save your game in multiple formats or use cloud-based platforms that automatically adjust to each student’s device. This way, everyone can join the fun without worrying about compatibility issues, and you can focus on what matters most—engaging your students in meaningful learning experiences!
Helping Students with Limited Devices
Not every student has access to the latest devices, but that shouldn’t stop them from joining the fun! The beauty of cross-platform software is that many programs work wonderfully on older smartphones and tablets. When planning your activity, test it first on the most basic device available to ensure smooth performance for everyone.
Consider offering flexible participation options. Students with older devices can often handle text-based quiz games better than graphics-heavy activities. You might also pair students strategically, allowing those with limited devices to team up with classmates who have newer technology. This builds collaboration while solving technical challenges!
Browser-based games typically require less processing power than downloaded apps, making them perfect for older devices. Keep offline backup plans ready too, since students with data limitations might struggle with connectivity. Simple adjustments like reducing animation settings or choosing simpler game templates can make activities accessible to all students, ensuring nobody misses out on the learning excitement!
Best Practices for Smooth Remote Gameplay
Ready to make your remote gameplay sessions run like a dream? Let’s dive into some practical strategies that’ll keep everyone connected and engaged!
Start by testing your game setup before class begins. Log in from different devices if possible to spot any quirks early. This quick preview can save you from scrambling when students join. Keep your game settings simple at first—you can always add complexity once everyone’s comfortable with the basics.
Communication is your secret weapon! Share clear joining instructions with students ahead of time, including any codes or links they’ll need. Consider creating a simple visual guide or screenshot tutorial that families can reference at home. When technical difficulties pop up, having a backup plan keeps the momentum going. Maybe that’s a quick chat message with instructions or an alternative activity ready to launch.
Customize your games to match your students’ needs and abilities. Most platforms let you adjust time limits, difficulty levels, and team sizes—use these features to create the perfect experience for your classroom. Start each session with a quick sound and video check, turning it into a fun ritual that gets everyone ready to play.
Finally, keep sessions energetic but manageable. Shorter, focused game rounds often work better than marathon sessions, especially for younger learners. Build in quick breaks between rounds where students can stretch or share reactions. Your enthusiasm sets the tone, so celebrate participation and effort throughout!
The beauty of cross-platform software is that it puts the power of interactive learning in every student’s hands, no matter what device they’re using. You don’t need to worry about whether everyone has the same type of computer or tablet anymore. Your classroom games and activities can reach that student joining from their phone, the one on a Chromebook, and the one using a family iPad, all at the same time.
Don’t be afraid to experiment! Try running a quick game with your students on different devices and see what works best for your unique classroom setup. You might discover that certain activities run smoother on particular platforms, or that mixing devices actually adds fun variety to your lessons.
Remember, the goal isn’t perfection on the first try. It’s about creating engaging, inclusive learning experiences where every student can participate fully. Start simple, learn as you go, and celebrate those small wins when everyone connects successfully. Your willingness to adapt and try new approaches is what makes you an amazing educator!