How Assistive Tech Turns Every Classroom Game Into an Inclusive Win
Inclusive classrooms thrive when every student can participate fully in learning activities, and assistive technology makes this possible without overwhelming your time or budget. Screen readers transform your digital review games into audio experiences for visually impaired students, while alternative keyboards with larger keys or touch-sensitive switches allow learners with motor challenges to buzz in during competitive activities. Closed captioning tools instantly make video content and audio instructions accessible to deaf and hard-of-hearing students, and text-to-speech software helps struggling readers engage with written game content at their own pace. The best part? Most assistive devices integrate seamlessly with the interactive tools you already love, requiring minimal technical knowledge to implement.
Your existing classroom games can become powerful inclusive learning experiences with just a few thoughtful adjustments. Start by identifying which students need accommodation, then explore free or low-cost assistive technology options already built into your devices—like Windows Narrator, Mac VoiceOver, or Google Chrome accessibility extensions. Many assistive tools work beautifully with customizable activities, letting you maintain the engaging, competitive spirit your students enjoy while ensuring nobody sits on the sidelines. Creating truly accessible classroom experiences means every learner gets to experience the joy and motivation that comes from active participation in your creative lesson plans.
What Makes Classroom Games Accessible? Understanding the Basics
Assistive technology sounds complex, but here’s the good news: it’s simply any tool or device that helps students with disabilities participate fully in learning activities. Think of it as leveling the playing field so every student can join the fun!
In your classroom, this might mean a student using text-to-speech software to hear game questions aloud, a larger font for better readability, or a switch device to click through PowerPoint slides. These tools transform barriers into bridges, making those exciting review games you already love accessible to all learners.
Why does this matter for your interactive activities? When you design games with accessibility in mind, you’re not just helping students with identified disabilities. You’re creating flexible learning experiences that benefit everyone. A student with a reading challenge appreciates audio support, but so does an English language learner or a student who’s simply an auditory learner.
The beauty is that many assistive technology features already exist in tools you use daily. PowerPoint includes built-in accessibility checkers, screen reader compatibility, and customizable display options. By understanding Universal Design for Learning principles and basic assistive technology, you can transform your existing game templates into inclusive experiences without starting from scratch or breaking your budget. Small adjustments create big impacts, ensuring every student feels welcome to play and learn.
Essential Assistive Devices That Transform Your Review Games
Screen Readers and Audio Support Tools
Screen readers are game-changers for visually impaired students who want to join in classroom activities! These tools work by reading aloud everything displayed on screen, from text boxes to button labels in your PowerPoint games. Popular options like JAWS, NVDA, and the built-in screen readers on most devices can navigate through your presentation slides seamlessly. The key is making sure your game elements are properly labeled so the screen reader can announce what’s happening.
Text-to-speech features are your best friend here! When designing your review games, add descriptive alt text to images and shapes. For example, instead of leaving a button unlabeled, describe it as “Question 1 – Geography Topic.” This way, students using screen readers know exactly what they’re selecting.
Audio cues take accessibility up another notch! Consider adding sound effects when answers are correct or incorrect, or use verbal instructions alongside visual ones. You can record your own voice giving directions or use built-in audio tools to create an inclusive experience. The beauty of customization means you can adjust volume levels, speaking speeds, and even choose different voices to match your students’ preferences. With these simple tweaks, every student can participate confidently and independently in your classroom games!
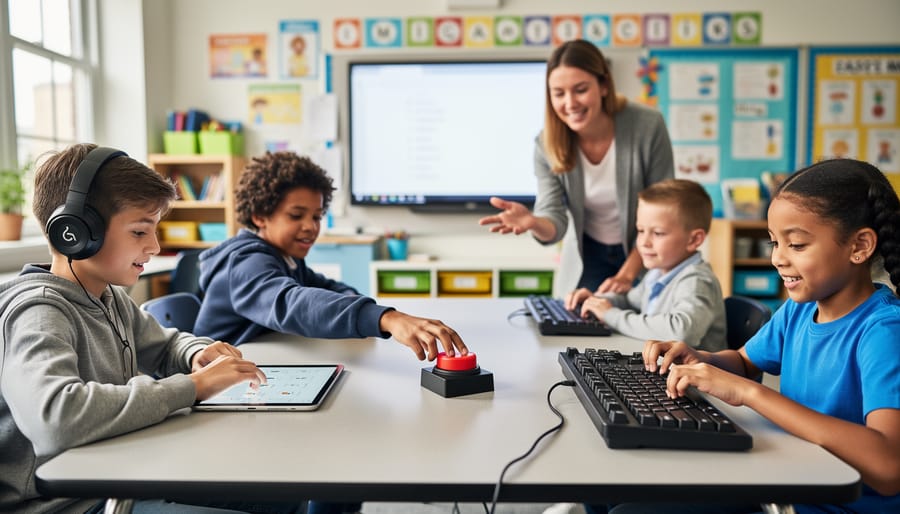
Alternative Input Devices for Physical Accessibility
Making your classroom games accessible is easier than you think! Let’s explore some fantastic devices that help students with mobility challenges join the fun and buzz in alongside their classmates.
Adaptive mice are game-changers for students who find traditional mice tricky to use. These come in all shapes and sizes—from trackball mice that require just finger movement to joystick-style mice that need minimal hand strength. Many are plug-and-play, so you can set them up in minutes without any tech headaches!
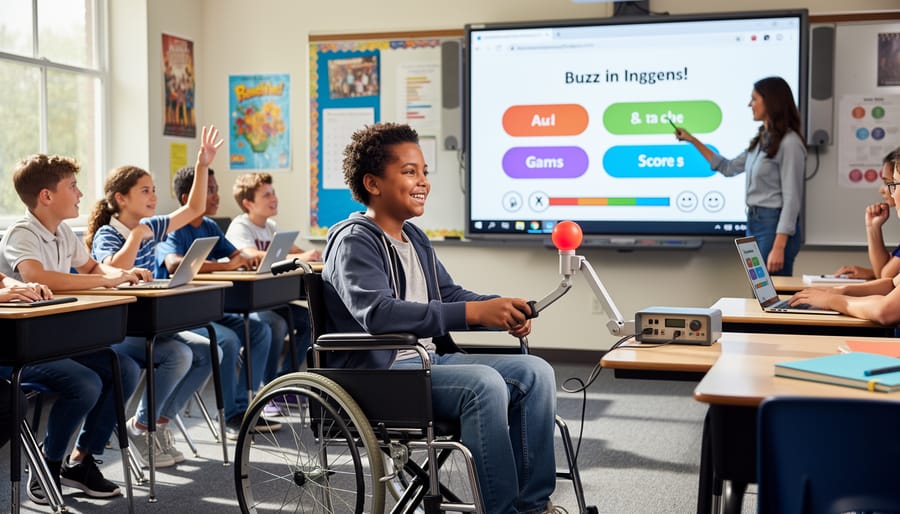
Switch devices are incredibly versatile tools that let students activate responses with whatever movement works best for them—a head tap, foot press, or gentle touch. You can connect these switches to your computer and customize them to work as a “buzzer” during review games. The beauty here is personalization: each student can use the switch that matches their abilities perfectly.
Touchscreens offer an intuitive way for many students to participate, especially when combined with tablet stands or adjustable mounts. Students can tap directly on answer choices during your PowerPoint games, making participation feel natural and immediate.
Voice control technology has come a long way! Built-in options like voice recognition software let students say their answers aloud or use simple voice commands to select responses. It’s motivating and engaging, plus it works with the technology you already have in your classroom.
Visual Support Technology
Making your game boards and scoreboards visible to every student is easier than you think! Visual support technology opens up a world of possibilities for learners with visual processing needs, and the best part? Many of these tools are already built into the devices you’re using.
Screen magnifiers are game-changers for students who need a closer look at game elements. Most computers and tablets come with built-in magnification features that let students zoom in on specific areas without losing clarity. Windows Magnifier and iPad’s Zoom function work beautifully with interactive review games, allowing students to see question text and answer choices clearly.
High-contrast displays make a huge difference too! Adjusting screen contrast helps text pop against backgrounds, reducing eye strain and improving readability. You can customize your game slides with high-contrast color schemes, think bold black text on bright yellow backgrounds or white text on dark blue.
Don’t overlook color adjustment tools either. Features like color filters and grayscale modes help students with color blindness or light sensitivity participate fully. These accessibility settings are usually found in your device’s display preferences, and they work seamlessly with your existing classroom games.
The beauty of these technologies? They’re customizable to each student’s unique needs, ensuring everyone can track scores, read questions, and celebrate their wins together!
Communication and Cognitive Support Devices
Communication challenges shouldn’t keep any student from joining the fun! When you’re creating interactive classroom games, AAC devices (Augmentative and Alternative Communication tools) open doors for students who communicate differently. These range from simple picture boards to sophisticated speech-generating devices that give every learner a voice in the game.
Picture Exchange Communication Systems work wonderfully for game-based activities. Students can point to or exchange picture cards to answer questions, make choices, or communicate with teammates. The beauty here is customization – you can create picture boards that match your game content exactly, whether you’re reviewing math facts or vocabulary words.
Digital communication apps like Proloquo2Go or TouchChat transform tablets into powerful speaking tools. Students tap symbols or type messages that the device reads aloud, perfect for participating in team discussions or calling out answers during review games. Many of these apps let you program custom vocabulary sets, so you can add game-specific terms your students need.
For students with cognitive differences, simplified interfaces make all the difference. Think bigger buttons, fewer distractions on screen, and step-by-step visual instructions. You can easily adapt PowerPoint games by using high-contrast colors, larger text, and consistent layouts. Consider adding visual timers and progress bars so students understand where they are in the game sequence.
The goal is removing barriers while keeping engagement high – and these tools make that totally achievable!
Simple Ways to Make Your PowerPoint Games Work With Assistive Tech
Design Choices That Make a Difference
Small adjustments to your presentation design can dramatically boost accessibility for all learners! Let’s explore some simple tweaks that keep your games exciting while welcoming every student.
Start with text that everyone can read comfortably. Choose fonts like Arial or Verdana at 24 points or larger for body text, and go even bigger for game titles and questions. Sans-serif fonts work best because they’re clean and easy to decode at a glance.
Color contrast is your secret weapon for inclusive design. Pair dark text with light backgrounds or vice versa. Think black on white, navy on cream, or white on dark purple. Avoid color combinations like red-green that challenge students with color blindness. Free online contrast checkers can verify your choices meet accessibility standards in seconds!
Button placement matters more than you might think. Position clickable elements at least 44 pixels in size and space them generously so students using touchscreens, adaptive mice, or switches can select them confidently. Place important navigation buttons consistently in the same location throughout your game.
Keep slide transitions simple and predictable. Avoid spinning, zooming, or flashing effects that can trigger discomfort or distraction. Gentle fades or no transitions at all work beautifully while maintaining engagement through your content rather than flashy effects.
These customization choices create games where everyone participates fully and confidently!
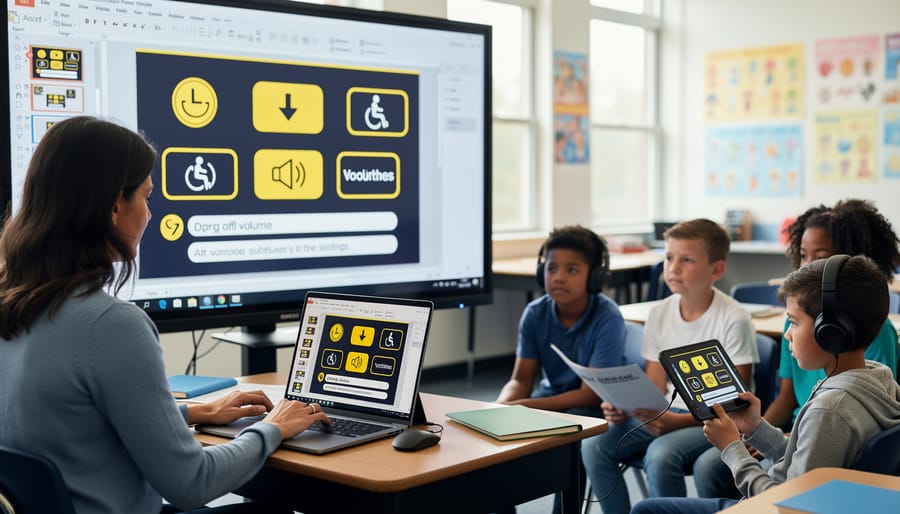
Adding Alternative Text and Audio Descriptions
Making your PowerPoint games accessible is easier than you might think! Let’s walk through how to add alternative text and audio descriptions so every student can fully participate.
Start with alt text for images. Right-click any image in your PowerPoint slide and select “Edit Alt Text.” A panel will appear on the right side of your screen. Here’s where the magic happens! Write a brief, descriptive sentence that explains what the image shows. For example, instead of “picture1.jpg,” write “A red apple with a green leaf on top.” This helps screen readers tell students what they’re looking at. Keep descriptions clear and under two sentences when possible.
For audio descriptions, think about adding voiceover narration to your slides. Click “Insert,” then “Audio,” and choose “Record Audio.” Record yourself explaining game instructions, question content, or what’s happening visually on the screen. Place the audio icon where students can easily access it, and set it to play automatically if that works better for your class flow.
Don’t forget to check your work! Turn on your computer’s screen reader and test how your game sounds. This quick preview ensures everything flows smoothly and makes sense when read aloud. Your students will appreciate the extra effort you put into making learning fun for everyone!
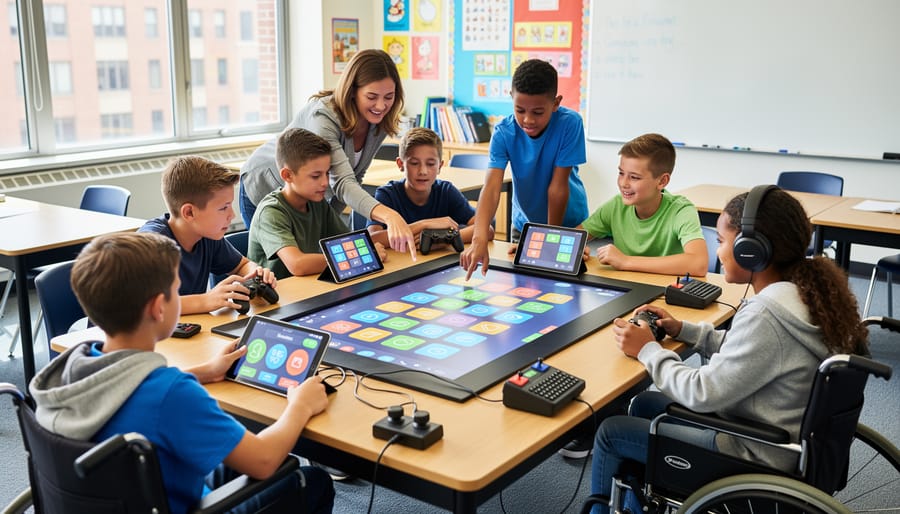
Real Classroom Success: Assistive Tech in Action
Let’s look at how real teachers have made their classroom games more inclusive with simple assistive technology solutions!
Mrs. Rodriguez runs weekly Jeopardy-style reviews in her fifth-grade class. She has three students with different needs: one uses a switch device, another has visual impairments, and a third struggles with fine motor control. Instead of traditional buzzers, she gave each team a different response method. Teams could use adaptive switches connected to tablets, large touch-screen buttons, or even voice-activated responses through speech-to-text apps. The result? Every student could participate equally, and the competitive energy in the room was incredible. Her students now ask for review games daily because everyone gets a fair shot at answering first.
Mr. Chen transformed his history trivia competitions by partnering students strategically. He paired learners who use text-to-speech software with strong visual learners, creating balanced teams where assistive tech became a team superpower rather than an accommodation. During puzzle challenges, students using screen readers actually solved clues faster because the audio delivery helped everyone focus on content rather than just reading. The best part? Other students started requesting to use the text-to-speech tools too, making assistive technology the norm rather than the exception.
Third-grade teacher Ms. Patel discovered that her escape room-style math challenges became more engaging when she offered multiple input methods. Students could type answers on keyboards, draw solutions on touchscreens, dictate responses, or use communication boards. This flexibility meant her student with cerebral palsy competed alongside classmates without missing a beat. The customization took just minutes but created an environment where every learner felt capable and valued.
Getting Started Without Overwhelming Your Budget or Schedule
Good news: you don’t need to transform your entire classroom overnight or spend your entire budget to start making a difference! The beauty of assistive technology is that you can begin right where you are, using tools you likely already have.
Start by exploring the built-in accessibility features on your existing devices. Most computers, tablets, and smartphones come loaded with free options like screen readers, text-to-speech, magnification tools, and customizable display settings. Take 15 minutes to explore your device’s accessibility menu and you’ll be amazed at what’s already there waiting to help your students.
Next, prioritize based on your students’ needs. Rather than trying to implement everything at once, focus on one or two accommodations that will make the biggest impact for your current class. Maybe it’s adding captions to your video content or increasing text size in your digital games. Small changes create meaningful access.
Tap into free resources and communities. Your school’s special education department, district technology coordinator, and online teaching communities can offer guidance and share what’s worked in their classrooms. Many assistive tech companies also provide free trials, so you can test before investing.
As you grow more comfortable, gradually expand your toolkit. Document what works well so you can replicate successes. Remember, inclusive design is a journey, not a destination. Each small step you take creates a more welcoming learning environment where every student can participate, engage, and shine. Celebrate your progress along the way and don’t hesitate to ask for support when you need it!
You’ve got this! The beauty of creating inclusive classroom games is that you don’t need to overhaul everything at once. Small tweaks can make a world of difference for students who need assistive technology, and here’s the best part: when you design with accessibility in mind, everyone benefits. Larger text helps students in the back row. Clear audio supports English language learners. Extra response time gives all students a moment to think deeply.
Ready to take your first step today? Pick just one thing. Maybe it’s adding captions to your next PowerPoint game, or choosing high-contrast colors for your slides. Perhaps you’ll ask students what would help them participate more fully. That single action starts a ripple effect.
Remember, inclusive play isn’t about perfection. It’s about progress and showing every student they belong in your classroom. Your willingness to try new approaches and embrace customization already makes you the kind of teacher who changes lives. So go ahead and make that one small change today. Your students are waiting to shine.