Transform Any Device Into Your Classroom Remote Control in Minutes
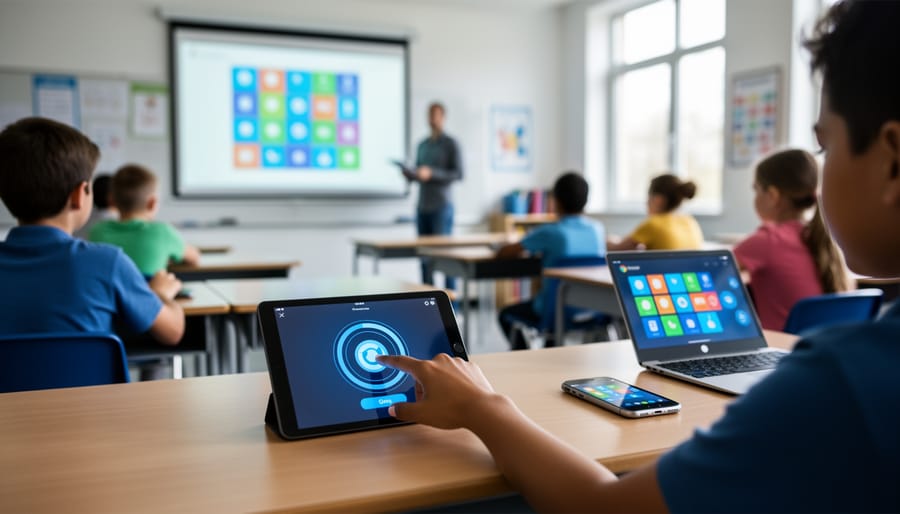
Transform any classroom device into a game controller for your PowerPoint review games by setting up a simple web-based remote system that works across iPads, Chromebooks, phones, and laptops simultaneously. Share one master link with your students, and they instantly gain control to buzz in, select answers, or advance slides—no downloads, no compatibility headaches, just pure engagement.
Create your remote control hub by connecting your presentation device to a free polling platform or response system that generates QR codes students can scan with any device. This cross-platform approach eliminates the “my device won’t work” excuse and lets you focus on learning instead of troubleshooting. Students simply open their cameras, scan, and they’re in the game.
Customize response options to match your game format—whether it’s multiple choice battles, speed rounds, or team competitions. The beauty of device-agnostic control means your carefully crafted 8×8 game grid displays perfectly on your main screen while every student participates from their own device, creating an inclusive experience where everyone can play regardless of their tech.
Test your setup before game day by running through one round with a few volunteer devices. This quick rehearsal ensures smooth gameplay and gives you confidence that when 25 students connect simultaneously, your classroom transforms into an energized learning arena where technology enhances rather than interrupts the fun.
What Is 8×8 Remote Control for Classroom Games?
Picture this: you’re running an exciting review game on your classroom projector, and instead of students shouting out answers or raising hands, they’re all clicking responses on their own devices. That’s the magic of 8×8 remote control for classroom games!
In simple terms, 8×8 remote control is a feature that transforms your PowerPoint game templates into interactive experiences where students can participate using their smartphones, tablets, or laptops. The “8×8” refers to a grid layout commonly used in many classroom game templates, creating an organized playing field with multiple answer choices or game spaces.
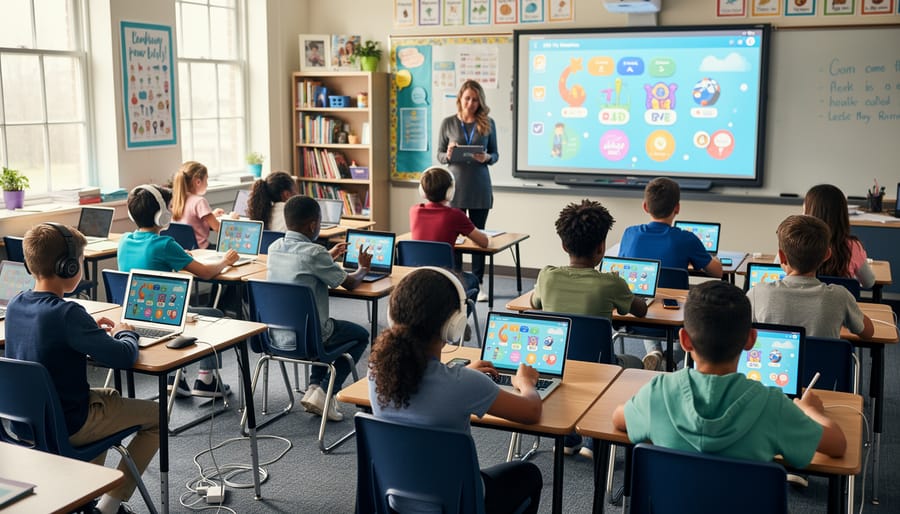
Here’s how it works: when you run a PowerPoint game with remote control capability, students connect to the game through their personal devices. They can see the questions or challenges on the main screen while submitting their answers privately through their phones or tablets. No more crowding around a single computer or waiting for one student to use the mouse!
This approach matters tremendously for today’s classrooms because it levels the playing field. Shy students who might never raise their hand can participate confidently. Students with different learning styles can engage at their own pace. Plus, you can instantly see who’s getting concepts and who needs extra support, all without putting anyone on the spot.
The beauty of remote control gaming is its flexibility. Whether your students use iOS, Android, Chromebooks, or Windows laptops, everyone can join in the fun. It brings that game-show excitement to review sessions while giving you valuable real-time data about student understanding. And let’s be honest, when students are excited about reviewing material, that’s a win for everyone!
The Device Compatibility Challenge Teachers Face
We’ve all been there—you’re ready to launch an exciting classroom game, but suddenly you’re troubleshooting why half your students can’t connect. Emma’s iPad shows one thing, Marcus’s Chromebook displays something completely different, and don’t even get started on the Android tablets that seem to have a mind of their own!
The reality is that modern classrooms are wonderfully diverse in technology, but that diversity can quickly become a headache. When you’re trying to run interactive activities with any device students bring, compatibility issues pop up everywhere. Connection drops happen at the worst moments, buttons don’t respond the same way across platforms, and screen sizes vary wildly from tiny phones to full desktop monitors.
Here’s the frustrating part: those one-size-fits-all solutions simply don’t cut it. What works beautifully on Windows PCs might crash on iOS devices. An app that’s perfect for Android might not even exist for Chromebooks. And when you’ve got 25 students all using different devices, you need something flexible enough to handle that variety without turning tech setup into a 20-minute ordeal.
The good news? Understanding these challenges is the first step toward finding solutions that actually work for your unique classroom mix. When you know what can go wrong, you can plan ahead and choose tools designed to embrace device diversity rather than fight against it.
Setting Up Cross-Platform Remote Play for Your Classroom Games
Before You Start: Quick Device Compatibility Checklist
Before diving into your 8×8 remote control setup, let’s make sure everything will work smoothly for you and your students! Here’s a quick checklist to save you time and avoid classroom hiccups.
First, check that your students can access a modern web browser. Chrome, Edge, Firefox, or Safari from the last two years work great. Older browsers might cause display issues, so updating is worth it!
Next, consider your internet connection needs. A stable connection is essential for remote play. Students need at least basic WiFi access, though games typically don’t require lightning-fast speeds. Test with a couple of devices first to see how your network handles multiple connections.
Screen sharing capabilities matter too! Make sure you can project your screen to students, whether through classroom display systems, video conferencing tools, or simple screen mirroring. This lets everyone see the game board while controlling from their own devices.
Finally, do a quick test run with different device types. Try a phone, tablet, and laptop to ensure the remote control buttons respond well across various screen sizes. This five-minute check prevents twenty minutes of troubleshooting during class time!
Option 1: Using Screen Sharing for Instant Access
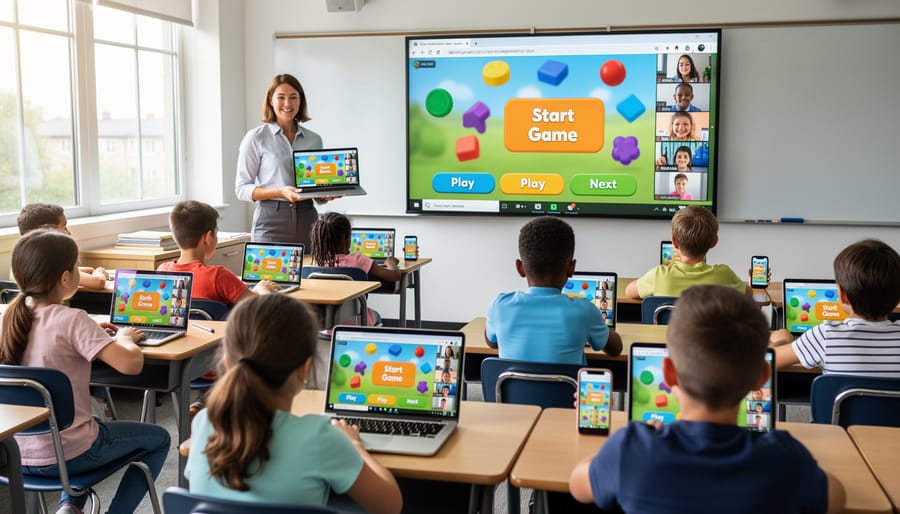
If you’re looking for the quickest way to get your 8×8 PowerPoint game up and running with remote students, screen sharing is your best friend! This method works beautifully because students don’t need any special software or access to files—they simply join your virtual meeting and participate right from their own devices.
Here’s how it works: Start your Zoom, Google Meet, or Microsoft Teams session and share your screen with your PowerPoint game displayed. Students can see all the action in real-time while staying on their own devices at home or anywhere else. The magic happens when they use the platform’s built-in features to interact with the game.
For answering questions, have students type their responses in the chat box. You can quickly scan answers and award points accordingly. Want to make it even more engaging? Use reaction features like raising hands or emoji responses for quick true/false questions or multiple-choice answers. Many teachers create a simple key system, like “thumbs up for A, heart for B, clapping for C.”
The beauty of this approach is its simplicity—no downloads, no complicated setup, and no worrying about device compatibility. Students on tablets, phones, Chromebooks, or computers can all participate equally. Plus, you maintain complete control of the game flow while keeping everyone engaged and excited to play along!
Option 2: Cloud-Based Control Methods
Cloud-based control methods offer a fantastic way to let every student participate in your game, no matter what device they’re using! This approach works beautifully because it’s completely platform-independent—Chromebooks, iPads, laptops, and even phones can all join in the fun.
Google Slides is your secret weapon here. Simply create a control slide with numbered buttons or choice options that mirror your game board. Students open this shared slide on their own devices, and here’s where the magic happens: they can use the comment feature or annotation tools to indicate their answers. You display the main game on your teacher screen while monitoring their responses in real-time.
Another option is using free polling platforms or collaborative whiteboards where students click their responses. These tools automatically track who answered what, making it super easy to award points and keep the game moving smoothly.
The best part? No downloads, no installations, and no compatibility headaches. Students just need an internet connection and a web browser. This method also gives you excellent data on student participation, so you can ensure everyone’s engaged and learning.
Set up is quick too! Create your control interface once, share the link with your class, and you’re ready to play. Students bookmark it for future games, making subsequent sessions even faster to launch. This flexibility means you can focus on the learning objectives while technology handles the logistics seamlessly.
Making It Work for Hybrid and Remote Classrooms
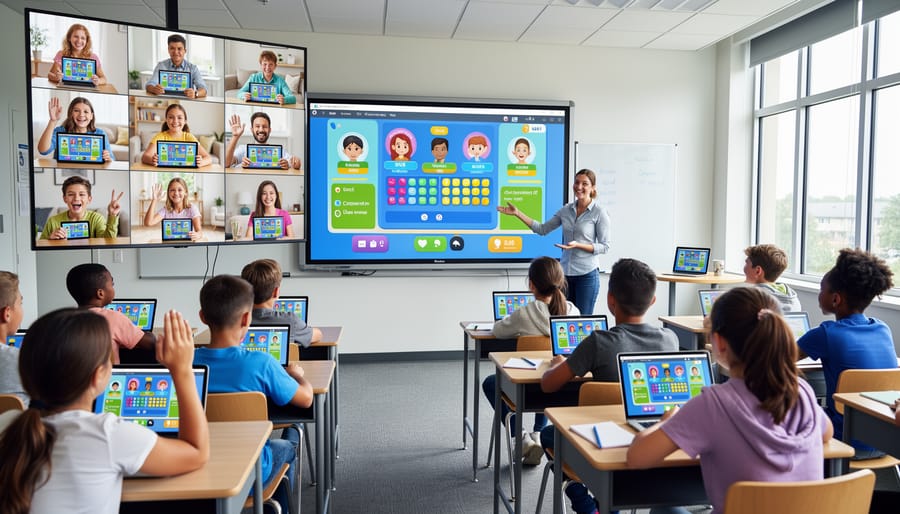
The beauty of 8×8 remote control is that it works seamlessly whether your students are sitting in front of you or joining from home. For hybrid and remote classrooms, the key is making sure everyone can access the game on their own device while you maintain control of the main display.
Here’s what works best: Share your screen through your video conferencing platform so remote learners see the same game board as in-person students. Then, have all students use their personal devices to input answers or make selections. This keeps everyone on equal footing, since both groups interact the same way.
Pro tip: Test your setup before game day by having a colleague or family member join remotely. This quick check ensures your screen sharing is clear and your remote control system responds to inputs from outside your classroom. The result? Every student gets the same engaging, interactive experience regardless of where they’re learning.
Quick Troubleshooting Tips When Devices Won’t Connect
We’ve all been there—you’re excited to launch your 8×8 game, students are ready to play, and then… nothing. Someone can’t connect, the sound isn’t working, or the game moves like molasses. Don’t worry! Most connection hiccups have super simple fixes that’ll get you back on track in minutes.
First up, the classic “I can’t see the game” problem. Nine times out of ten, this means a student typed the wrong link or needs to refresh their browser. Have them double-check the URL you shared or try clicking the link again. If that doesn’t work, ask them to close the tab completely and rejoin. It’s like the digital version of turning it off and on again, and it really works!
Audio troubles are another common challenge. If students can’t hear sound effects or music, make sure their device volume is turned up (surprisingly easy to overlook!) and that they’ve allowed browser permissions for audio. A quick tip: have everyone do a sound check before you start playing for real.
Experiencing lag problems? Slow gameplay usually happens when too many browser tabs are open or when WiFi is struggling. Ask students to close unnecessary tabs and windows. If everyone’s lagging, it might be your classroom WiFi needing a breather—try having half the class play while the other half does something offline, then switch.
Can’t get the remote control feature working? Make sure you’re using a compatible browser like Chrome or Edge, and verify that everyone’s on the same shared link. Sometimes clearing your browser cache gives things a fresh start too.
Remember, technology hiccups happen to everyone, and your patience sets the tone for your whole class!
Making Remote Control Games More Engaging Across All Devices
Getting everyone engaged in your remote control game can be tricky when students are using different devices, but a few smart tweaks make all the difference! Start by testing your 8×8 grid game on multiple devices before class time. Pull it up on your phone, tablet, and computer to see how it displays. This quick preview helps you spot any text that’s too small or buttons that might be hard to tap on smaller screens.
Keep your grid squares generously sized and use bold colors with high contrast so they’re visible on every screen type. Simple, clean designs work better than cluttered layouts when students are tapping on phones. If you’re using clickable squares in PowerPoint, make sure they’re big enough for finger taps, not just mouse clicks.
Consider creating visual cues that work universally across devices. Instead of relying on hover effects that only work with a mouse, use clear numbering or color-coding for your 8×8 grid squares. This way, whether students are clicking, tapping, or touching, they know exactly where they are in the game.
Add flexible participation options too! Let students call out numbers verbally through video chat while you control the board, or have them type coordinates in the chat if their device struggles with the presentation. The goal is making sure every student can play fully, regardless of what device they’re holding. When everyone can participate equally, the energy in your virtual classroom soars!
Getting started with 8×8 remote control for your classroom games doesn’t have to feel overwhelming! The beauty of cross-platform setups is that you can begin with the basics and build up as you get more comfortable. Start simple—maybe just your laptop controlling a display screen—and gradually add more devices as you discover what works best for your students.
What makes these tools so valuable is how they level the playing field for everyone in your classroom. Students using tablets, Chromebooks, or phones can all participate equally, creating an inclusive environment where the focus stays on learning and fun rather than technical barriers. The engagement you’ll see when students realize they can all play together, regardless of their device, is absolutely worth the initial setup time.
Remember, every tech-savvy teacher started somewhere, and you’ve got this! Your willingness to explore these interactive tools will transform review sessions into exciting learning experiences your students will look forward to every time.