How Video Conferencing Transforms Your Classroom Game Platform Into a Connected Learning Experience
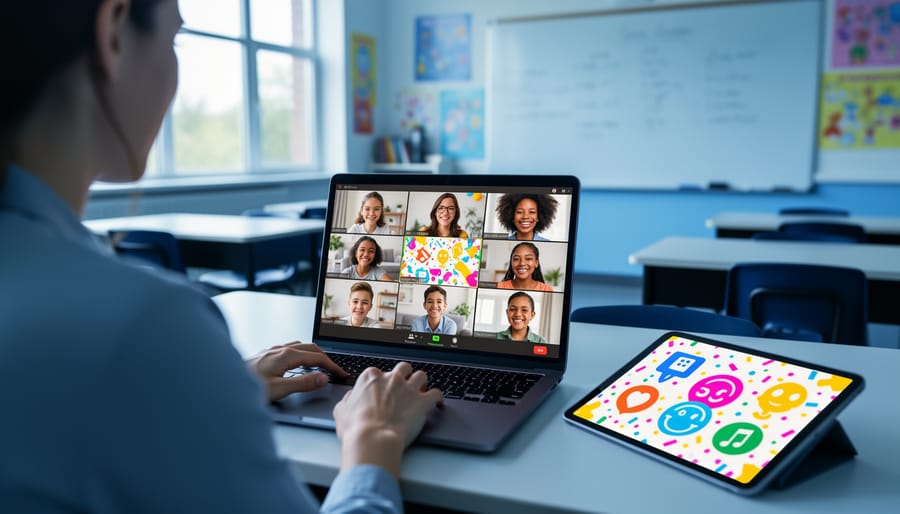
Transform your remote or hybrid classroom by pairing video conferencing with game-based learning platforms that keep students engaged and connected. Zoom, Google Meet, and Microsoft Teams all support screen sharing and breakout rooms that work seamlessly with educational games like Kahoot, Gimkit, and Blooket—letting you host interactive quizzes and competitions while seeing student reactions in real time.
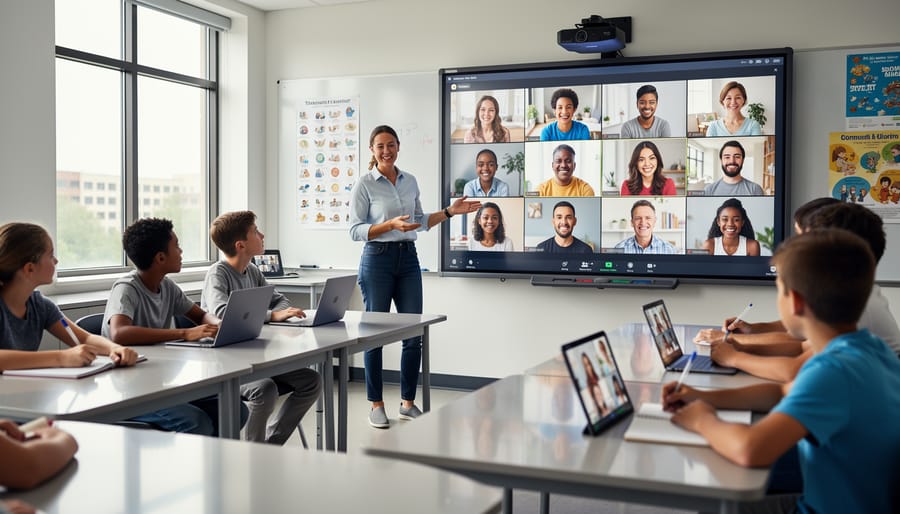
Start by testing your chosen combination before class: share your game screen, verify students can see questions clearly, and confirm audio works for timers and sound effects. Create breakout rooms for team-based challenges, assigning 3-4 students per room with game links ready to paste in the chat. Use the spotlight or pin feature to highlight winning teams and celebrate achievements, building the same energy you’d have in person.
Customize games to match your lesson objectives while maintaining video connections—students stay accountable when cameras are on, and you can quickly gauge confusion through facial expressions. Set clear expectations about muting microphones during gameplay but unmuting for celebrations and discussions. The combination turns ordinary video lessons into dynamic experiences where students actively participate rather than passively watch screens, making distance learning feel collaborative and fun.
Why Video Conferencing and Game Platforms Make Perfect Partners
Here’s the thing about remote and hybrid learning: keeping students excited and connected can feel like an uphill battle. But when you pair video conferencing with gamified learning platforms, something magical happens. These two technologies were practically made for each other.
Think about it. Game platforms bring the fun, competition, and interactive elements that make learning stick. Video conferencing adds the human connection, real-time interaction, and community feeling that students desperately need, especially when they’re learning from home. Together, they create an experience that’s way more engaging than traditional online lessons.
The beauty of this partnership is how naturally it fills the engagement gaps in distance learning. Students who might zone out during a standard video lecture suddenly perk up when there’s a live trivia game happening on screen. That competitive spirit that makes classroom games so effective doesn’t have to disappear just because students are in different locations. With video conferencing, they can still see their classmates’ reactions, celebrate victories together, and feel that collective energy.
Plus, you get the best of both worlds for customization. You can adapt games to match your lesson plans while using video features like breakout rooms for team challenges or screen sharing to display leaderboards. Students stay motivated because they’re not just passive viewers, they’re active participants who can interact with both the content and their peers in real time. It’s the perfect combo for making distance learning feel less distant and a whole lot more dynamic.
Popular Video Conferencing Tools That Work With Your Game Templates
Zoom for Interactive Game Sessions
Zoom brings fantastic features that transform your virtual classroom into an interactive gaming hub! The screen sharing option lets you broadcast game boards, puzzles, or trivia questions so every student can see clearly. You can share your entire screen or just a specific application window, giving you flexibility in what you present.
The breakout rooms feature is a game-changer for team-based activities. Split your class into smaller groups of 2-6 students for collaborative games like scavenger hunts, escape rooms, or team challenges. You can pop into each room to check progress and offer hints, making it feel like you’re walking around a physical classroom. Students stay engaged because they’re working directly with their teammates.
The spotlight feature deserves special attention too! When a student gets the right answer or reaches a milestone, spotlight them so everyone celebrates their success. This creates exciting moments that motivate the whole class. You can also use it to highlight student presenters during show-and-tell style games.
Customize your Zoom settings before game time by enabling reactions (thumbs up, applause) so students can cheer each other on. These small touches make virtual game sessions feel energetic and connected, keeping your students excited and participating throughout the activity.
Microsoft Teams for Seamless Integration
If you’re already using Microsoft Teams at your school, you’re in luck! Teams makes video conferencing with classroom games incredibly smooth since everything lives in one place. The magic happens when you share your screen to display PowerPoint game templates during your video calls. Simply click the share icon during your meeting and select your PowerPoint window—students see your game board instantly, with no clunky downloads or separate apps to juggle.
What really sets Teams apart is its channel organization. Create dedicated channels for different games or subjects, like “Friday Trivia” or “Math Challenges,” where you can store game files, post instructions, and even let students vote on upcoming games. Your PowerPoint templates automatically save to your Teams files, making them easy to access whenever inspiration strikes.
The best part? Teams plays beautifully with all your existing PowerPoint customizations. Those animated transitions, sound effects, and interactive buttons you spent time perfecting work seamlessly during screen sharing. Plus, students can use the chat feature to submit answers simultaneously, keeping everyone engaged and preventing that awkward silence when only one student can respond at a time.
Google Meet for Simple Setup
If your school already uses Google Workspace, you’re in luck! Google Meet is probably the easiest video conferencing tool to get started with. Everything connects seamlessly with your existing Google Classroom, Calendar, and Drive accounts, so there’s no complicated setup or new login information to remember.
The interface is beautifully simple. Your students can join meetings with just one click directly from a Google Calendar invite or Classroom announcement. No downloading special software or creating separate accounts. Screen sharing works like a charm too, making it super easy to display educational games, presentations, or websites during your lessons. Just click the “Present now” button and choose what you want to share.
What really makes Google Meet shine is its accessibility features. The built-in captions help students who are hard of hearing or learning English, and the straightforward controls mean even younger students can navigate independently. Plus, you can customize your meeting settings to control who can join, mute participants, and manage screen sharing permissions. This gives you the flexibility to create a safe, focused learning environment that works perfectly for your classroom needs.
Setting Up Your Game Platform for Video Conferencing Success
Technical Setup Checklist
Before launching your game-powered video lesson, take a few minutes to run through these essential technical checks. Trust me, these small steps will save you from those awkward mid-lesson tech hiccups!
Start with your audio and video settings. Test your microphone and speakers before students join. Nothing derails engagement faster than “Can you hear me?” repeated ten times! Position your camera at eye level and ensure good lighting so students can see your expressions and reactions during gameplay. If you’re demonstrating game elements on screen, consider using a headset to minimize background noise and echo.
Screen sharing deserves special attention when games are involved. Always close unnecessary tabs and applications before sharing your screen. Choose “Share Specific Window” rather than your entire desktop to keep things professional and distraction-free. Make your game window as large as possible so every student can clearly see point tallies, questions, and visual elements. Before the lesson begins, ask a colleague or family member to view your shared screen from another device to confirm everything is visible and legible.
Here’s a game-changer tip: adjust your video conferencing layout so you can see student reactions while presenting. Many platforms let you keep a small gallery view visible alongside your shared content. This way, you’ll catch confused faces, excited hand-raising, or signs that someone needs help.
Finally, encourage students to use the chat feature for quick questions without interrupting game flow. Set clear expectations about when to unmute, and consider assigning a student helper to monitor the chat during intense game moments. With these basics covered, you’re ready to create magic!
Adapting Game Rules for Virtual Play
Getting your favorite classroom games to work smoothly in a virtual setting takes a bit of creativity, but the results are absolutely worth it! Here’s how to make those adjustments without losing the magic.
For buzzer systems, the chat function becomes your best friend. Have students type an agreed-upon symbol (like “!” or their hand emoji) to buzz in. You can easily spot who was first by checking the timestamp. Alternatively, use the raise hand feature built into most platforms, or try free online buzzer tools that integrate with your video call.
Turn-taking gets easier when you establish clear visual cues. Create a rotation list visible on screen share, or simply call on students in alphabetical order. You can also use the spotlight feature to highlight whose turn it is, making it crystal clear for everyone watching.
Team coordination requires a different approach than in-person play. Use breakout rooms for team huddles, giving groups 2-3 minutes to strategize before returning to the main room. Encourage teams to use private chat for quick discussions during gameplay, or assign team captains to coordinate responses.
Maintaining game flow means keeping things moving! Set visible timers using screen share so everyone knows how long they have. Prepare all materials in advance and have them ready to display instantly. Consider shorter rounds than you’d use in person since virtual attention spans differ.
The key is testing your modified rules with a small group first, then tweaking based on what works. Your students will appreciate the effort, and soon these adaptations will feel completely natural!
Creative Ways to Use Video Conferencing Features During Games
Breakout Rooms for Team Collaboration
Breakout rooms are your secret weapon for transforming whole-class video calls into dynamic team experiences! These smaller virtual spaces let students collaborate on strategy sessions, work through challenging puzzles together, or compete in friendly small-group challenges while you monitor their progress.
Setting up breakout rooms is surprisingly simple. Most platforms like Zoom let you pre-assign teams or randomly shuffle students into groups with just a few clicks. You can customize the number of rooms and set time limits to keep activities focused and energetic.
Try using breakout rooms for escape room-style challenges where teams solve clues together, or for trivia competitions where groups huddle to discuss answers before rejoining the main session. The beauty is that quieter students often feel more comfortable participating in these intimate settings.
Pro tip: Pop into different rooms to check progress, offer hints, and keep the energy high. You can also broadcast messages to all rooms simultaneously when time is running out or teams need a helpful nudge in the right direction!
Chat Functions for Interactive Responses
The chat feature is your secret weapon for keeping everyone involved without interrupting the flow of your lesson! Encourage students to type quick answers or questions while you’re teaching—it’s perfect for shy learners who might hesitate to speak up. Plus, you can review chat responses later to gauge understanding.
Polling features are game-changers for instant feedback. Create multiple-choice questions to check comprehension mid-lesson, and watch those results pop up in real-time. Students love seeing how their answers compare to their classmates, and you’ll immediately know if you need to revisit a concept.
Don’t underestimate the power of emoji reactions! They’re a fun, low-pressure way for students to show they understand, agree, or need help. Set up simple systems like “thumbs up if you’re ready to move on” or “heart if you loved this example.” These quick interactions keep energy high and make virtual learning feel more connected and personalized to your classroom community.
Recording Sessions for Review and Absent Students
Recording your game sessions is a total game-changer for keeping everyone on track! When students miss class due to illness or appointments, they won’t fall behind because they can watch exactly what happened during the game activity. Simply hit that record button before starting your virtual game session, and you’ve created an instant resource for absent learners.
These recordings also work wonderfully as review materials before tests or when introducing similar concepts later. Students can pause, rewind, and rewatch tricky parts at their own pace, which is especially helpful for visual and auditory learners who benefit from repetition. Plus, you can build a library of successful game sessions to share with colleagues or use year after year. Just remember to check your district’s policies about recording students and obtain necessary permissions beforehand. Store recordings securely on your school’s approved platform, and you’ll have created a valuable learning archive that supports all students.
Troubleshooting Common Challenges
Managing Audio and Video Issues
Nothing disrupts a great classroom game faster than audio feedback or choppy video! Let’s tackle these common hiccups so your students stay focused on learning.
First, combat that annoying echo by asking students to use headphones or earbuds. This simple fix prevents their microphone from picking up sound from their speakers. If you’re the host, mute participants when they’re not actively speaking, especially during game explanations.
Dealing with lag or connectivity issues? Encourage students to turn off their cameras during gameplay while keeping audio on. This reduces bandwidth strain significantly. You can also close unnecessary browser tabs and applications to free up processing power.
Before diving into game time, run a quick tech check. Have everyone test their audio and video for 30 seconds while you verify everything works smoothly. It’s much easier to troubleshoot technical issues before the lesson begins than mid-game.
Pro tip: Share your screen instead of asking students to navigate to game links independently. This keeps everyone on the same page and minimizes confusion. Plus, you maintain better control over pacing and transitions between activities, creating a seamless experience that maximizes engagement and learning time.
Keeping All Students Engaged
Keeping everyone engaged during video conferencing games can feel like herding cats, but with the right strategies, you’ll create an inclusive experience for all students. Start by assigning specific roles to different learners—maybe one student reads questions aloud while another keeps score. This distributes participation naturally and gives everyone a moment to shine.
Set clear expectations before you begin. Create a simple visual chart showing participation guidelines, like using the raise hand feature or waiting for your turn. Display it on screen so students can reference it throughout the activity.
Monitor engagement by enabling gallery view so you can spot students who seem distracted or disconnected. Call on quieter students by name occasionally, but keep it light and encouraging. Try using breakout rooms for team-based games, which gives shy learners a smaller, safer space to contribute.
For fair play, consider using random name generators or digital spinners to select participants. This removes any perceived favoritism and adds an element of excitement. Keep games moving at a brisk pace—short rounds prevent wandering attention spans. Remember to celebrate participation over perfect answers, creating a supportive atmosphere where every student feels valued and motivated to join in.
Bringing video conferencing and classroom game platforms together opens up exciting possibilities for creating dynamic, connected learning spaces. You’ve now got practical strategies to blend these tools seamlessly, whether your students are sitting in front of you, learning from home, or joining from another school across the globe. The beauty of this combination lies in how it breaks down barriers and keeps everyone actively participating in the fun.
Don’t be afraid to start small and experiment with what works best for your classroom. Try one strategy at a time, customize it to fit your teaching style, and watch how your students respond. Remember, the goal is to create inclusive learning experiences where every student feels valued and engaged, no matter where they’re logging in from. With these tools in your teaching toolkit, you’re ready to transform your classroom into an interactive learning community that celebrates participation, collaboration, and yes—plenty of fun along the way!